Azure Functions: Getting Started


Alright, so this is for a developer who's never created an Azure Function and want to get started. If you're not a dev and just want to get a feel of it, this is probably not a post for you, go to the Azure Portal and follow their steps to create an azure function using the UI. But if you are a dev, here I'm gonna cover creating a brand new Azure Functions in Visual Studio, configuring Continuous Integration and adding some integrations to it.
Tools:
- Visual Studio 2015 or later
- Visual Studio Tools for Azure Functions
- Azure Storage Explorer
Here are the steps I'm following:
- Create an Azure Function Project
- Create a new Azure Function (Webhook) in Visual Studio
- Publish to GitHub
- Create a new Azure Function in the Azure Portal
- Configure Continuous Deployment
- Create a new Storage Queue
- Configure GitHub to call Webhook
- Configure Azure to queue entry
- Running Through
The source code covered in this post is available here
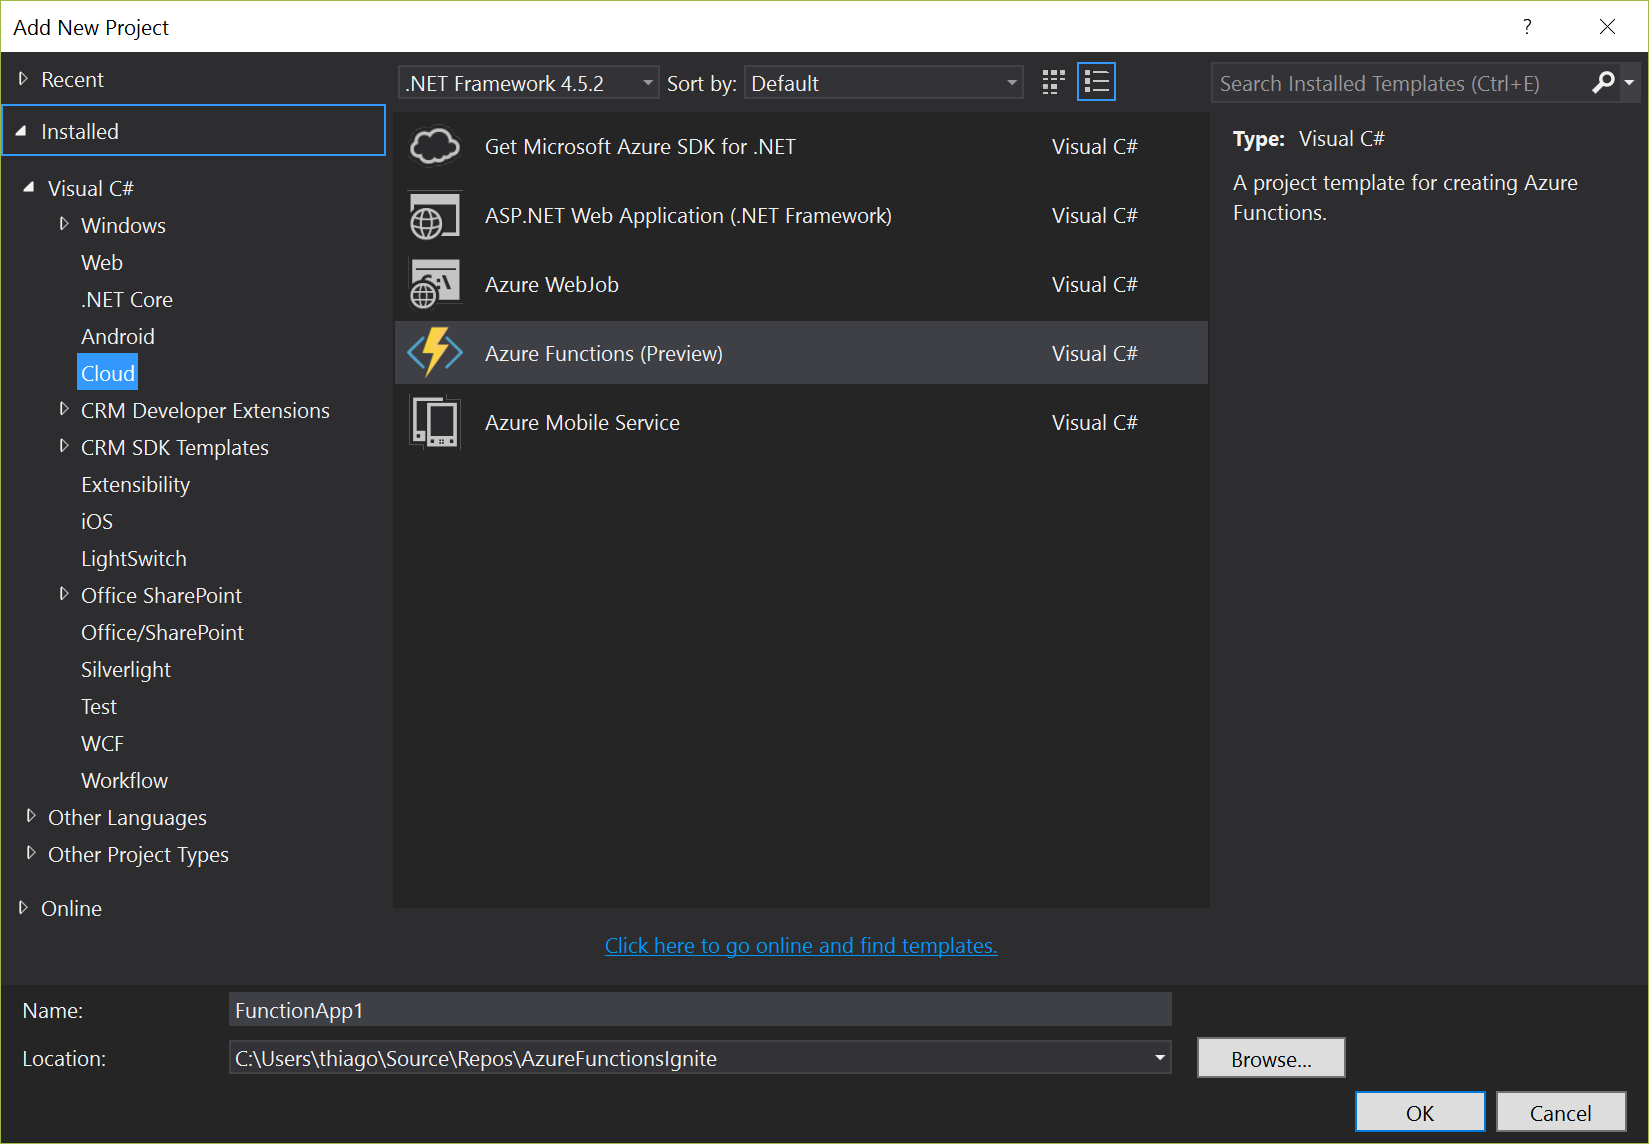
Create an Azure Function Project
Once the Azure Functions Tools for Visual Studio is installed, you'll find new project templates in Visual Studio, go to File > New Project > Cloud > Azure Functions:
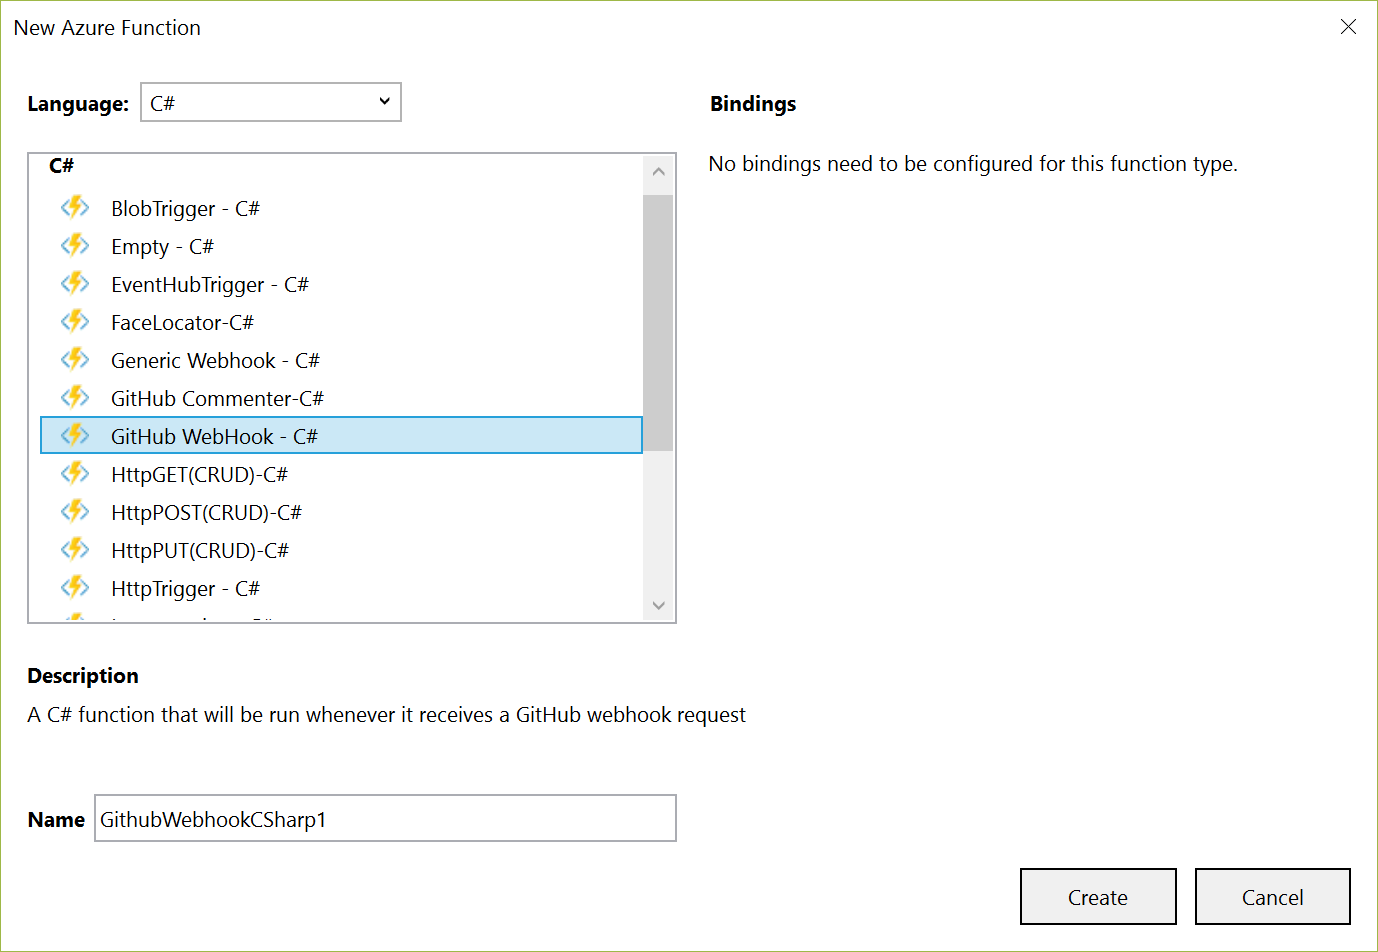
Create a new Azure Function (Webhook) in Visual Studio
With the project already created, let's create a new Azure Function. Right-click on the project > Add > New Azure Function:

You'll find a bunch of Azure Function templates, for this example I'm going to use the GitHub Webhook:
This will create a simple Function and its only purpose is to log when a comment is left in a GitHub issue. Check the run.csx file
public static async Task<HttpResponseMessage> Run(HttpRequestMessage req,
   TraceWriter log)
{
    log.Info($"C# HTTP trigger function processed a request. RequestUri={req.RequestUri}");

    // Get request body
    dynamic data = await req.Content.ReadAsAsync<object>();

    // Extract github comment from request body
    string gitHubComment = data?.comment?.body;

    return req.CreateResponse(HttpStatusCode.OK, "From Github:" + gitHubComment);
}
If you also check the function.json file you will notice some of the integrations:
{
  "disabled": false,
  "bindings": [
    {
      "type": "httpTrigger",
      "direction": "in",
      "webHookType": "github",
      "name": "req"
    },
    {
      "type": "http",
      "direction": "out",
      "name": "res"
    }
  ]
}
Publish to GitHub
In this example, I'm using GitHub to push my code to, but feel free to use something else. In any case, right-click on the solution and add to source control and configure where you want to publish your code to.
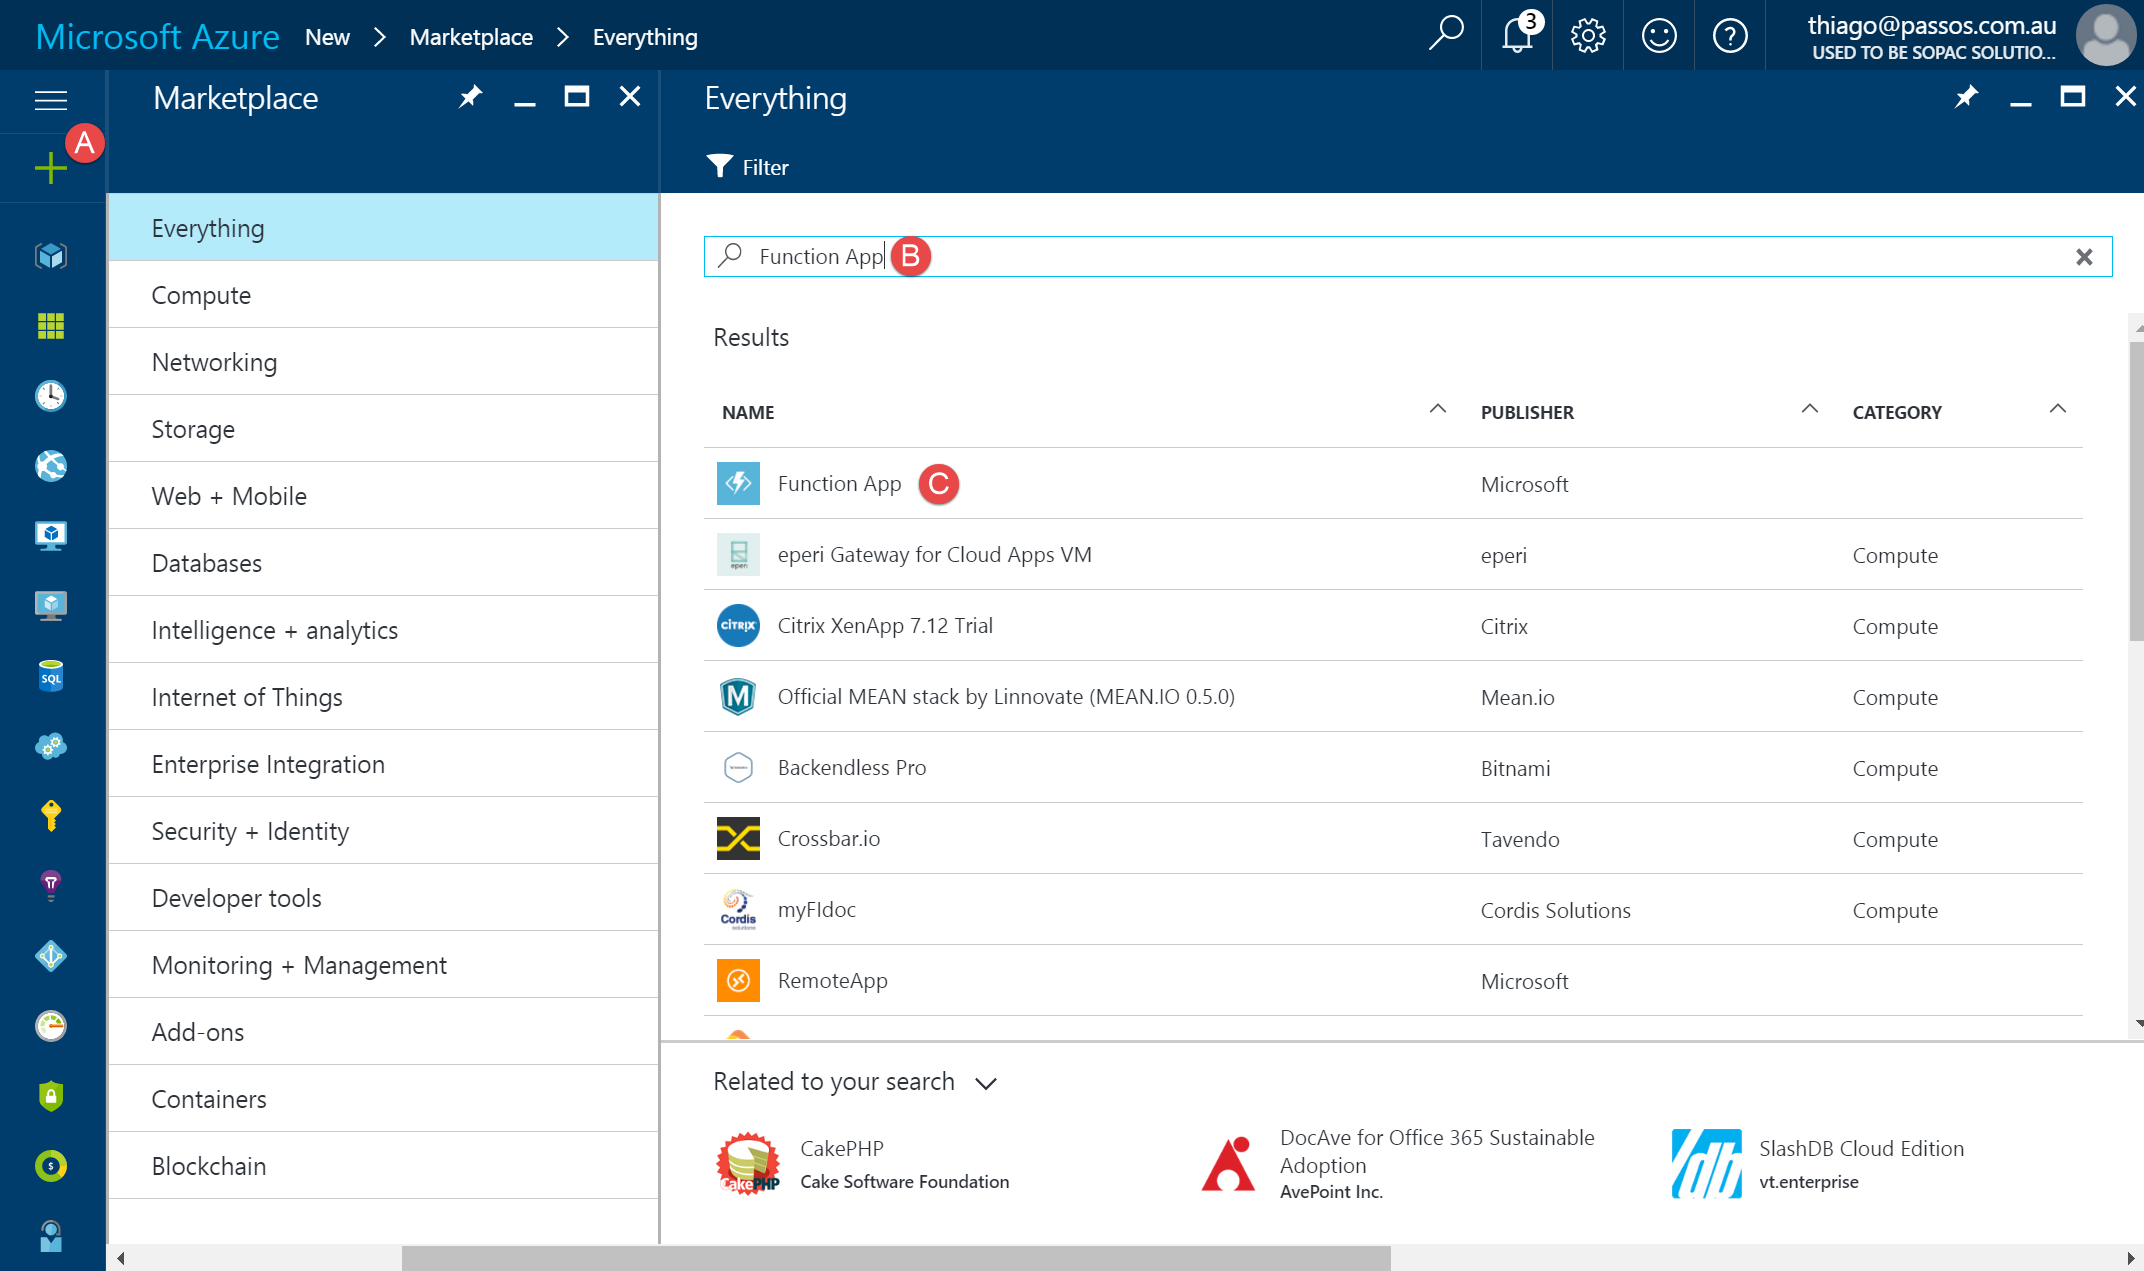
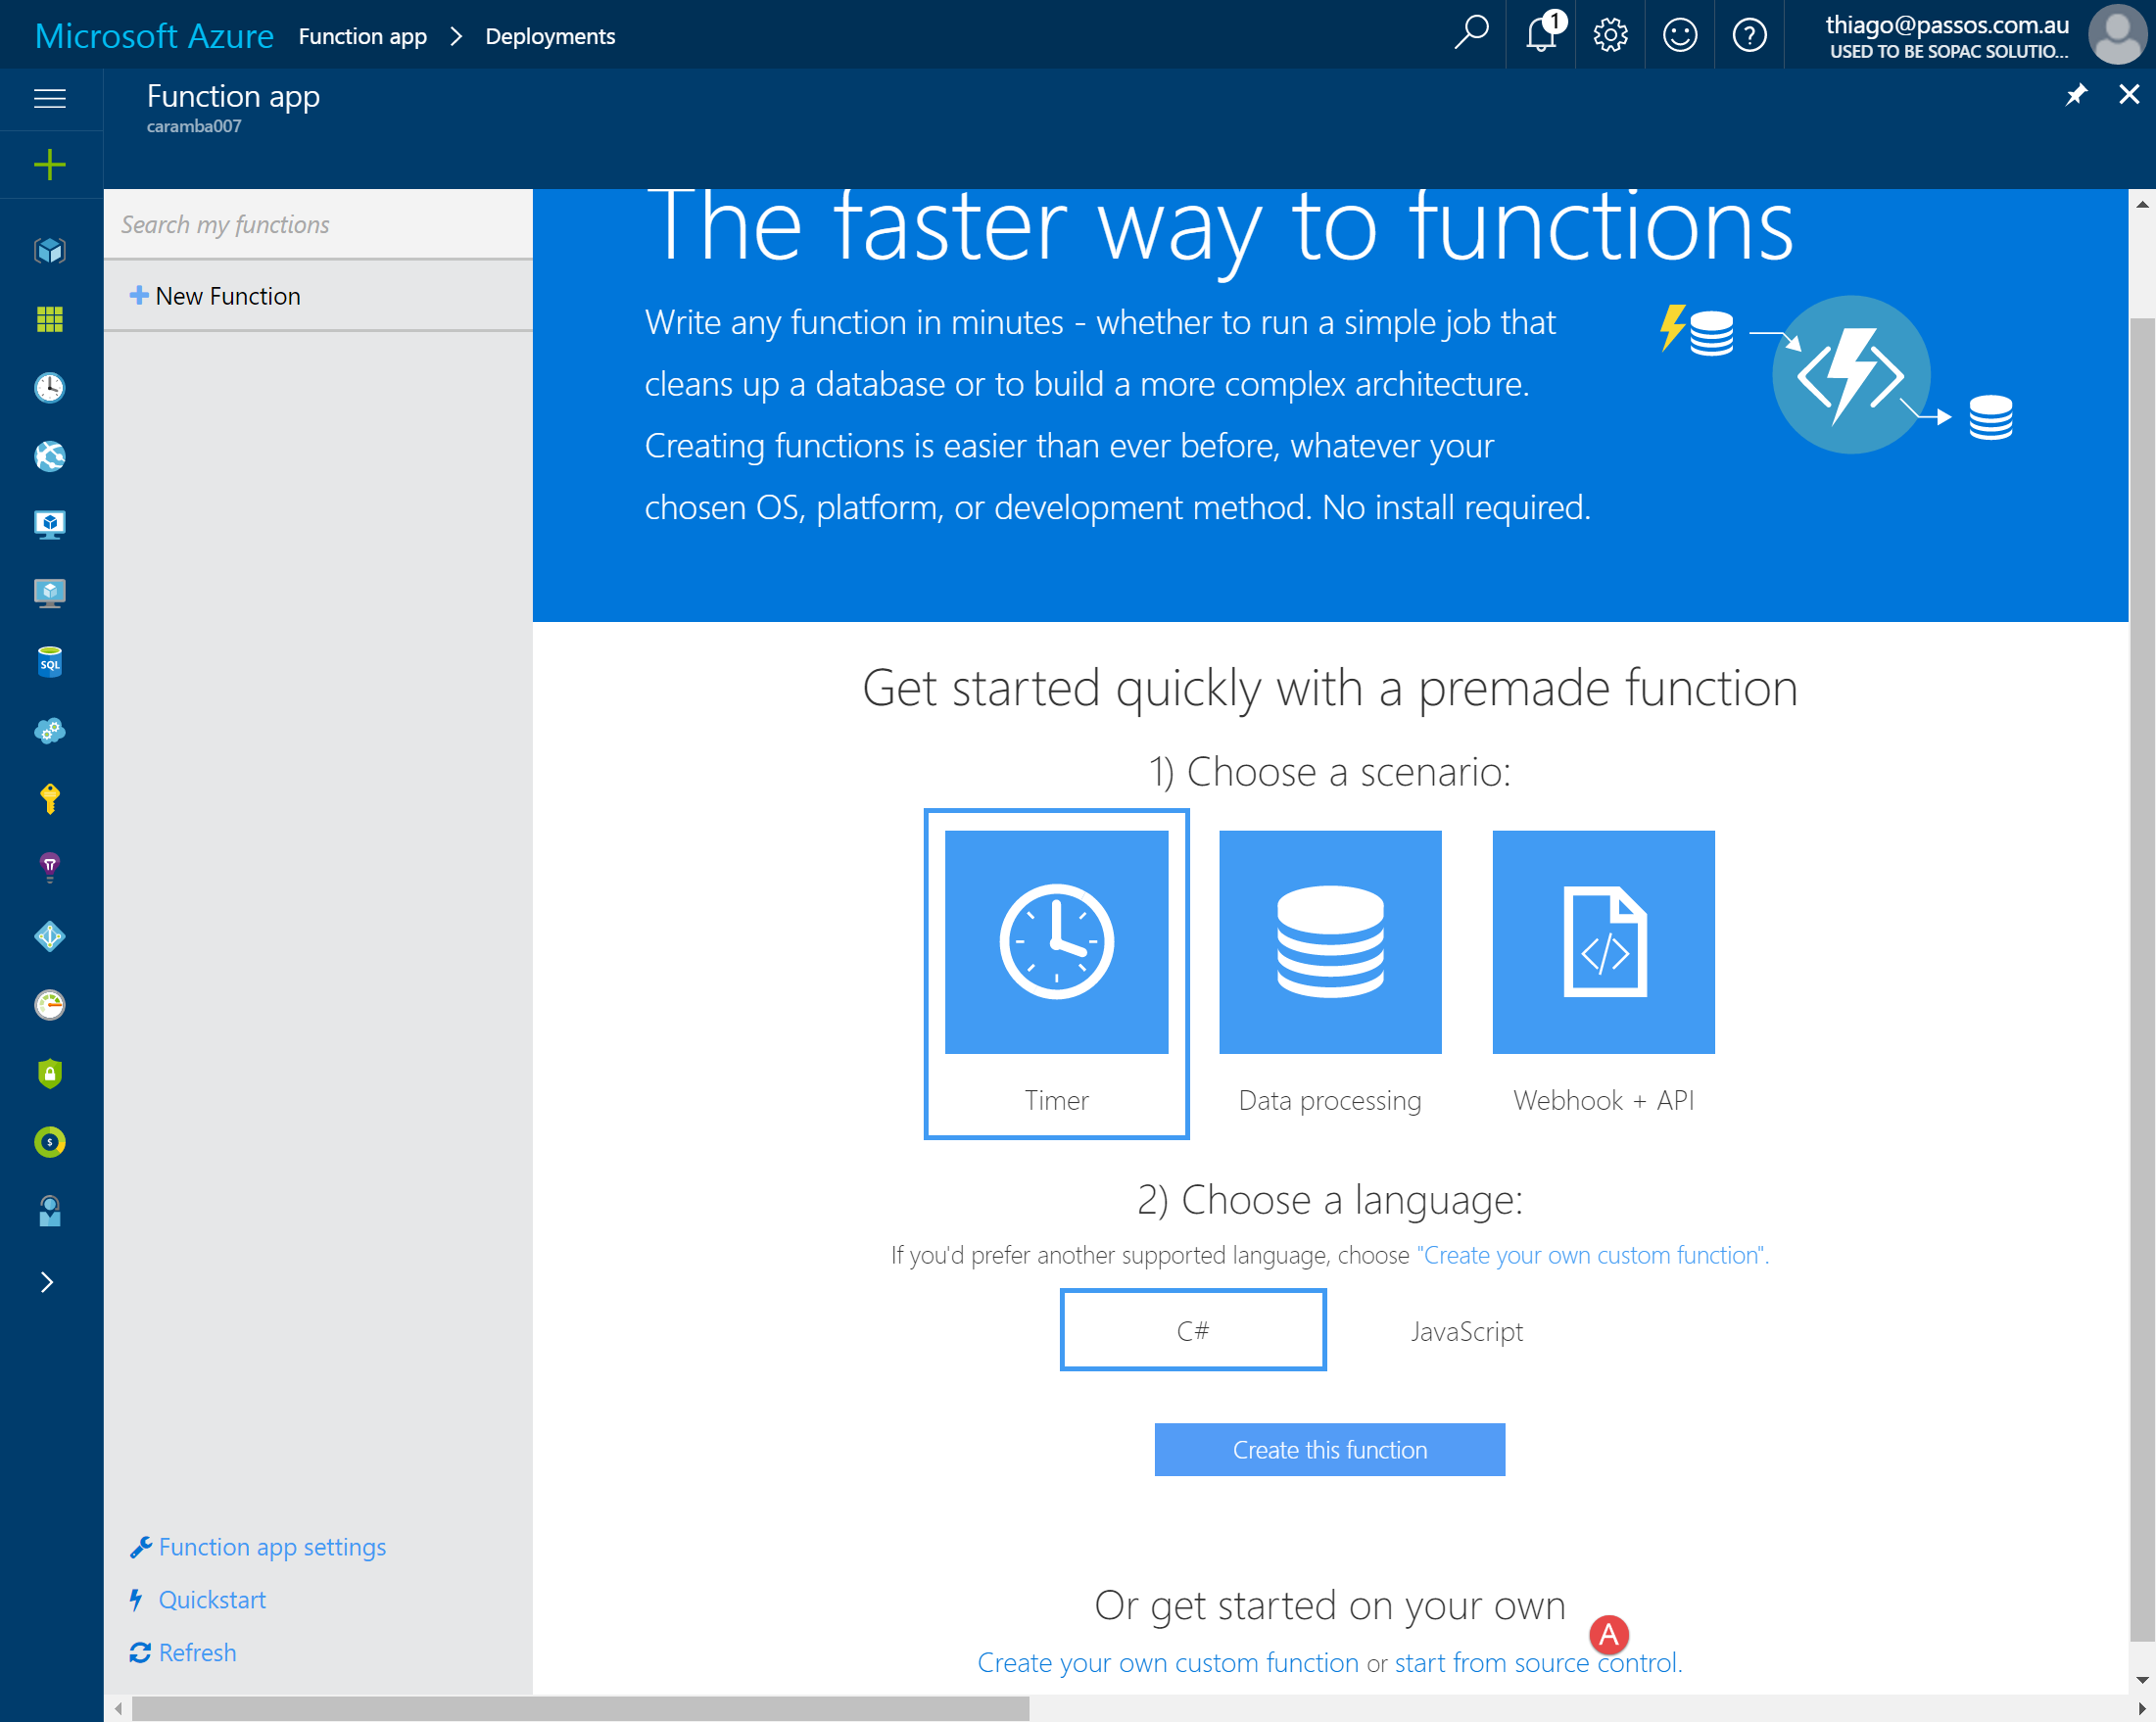
Create a new Azure Function in the Azure Portal
Go to the Azure Portal and provision a new Function App by following the steps below. Then follow the instructions in the screen.
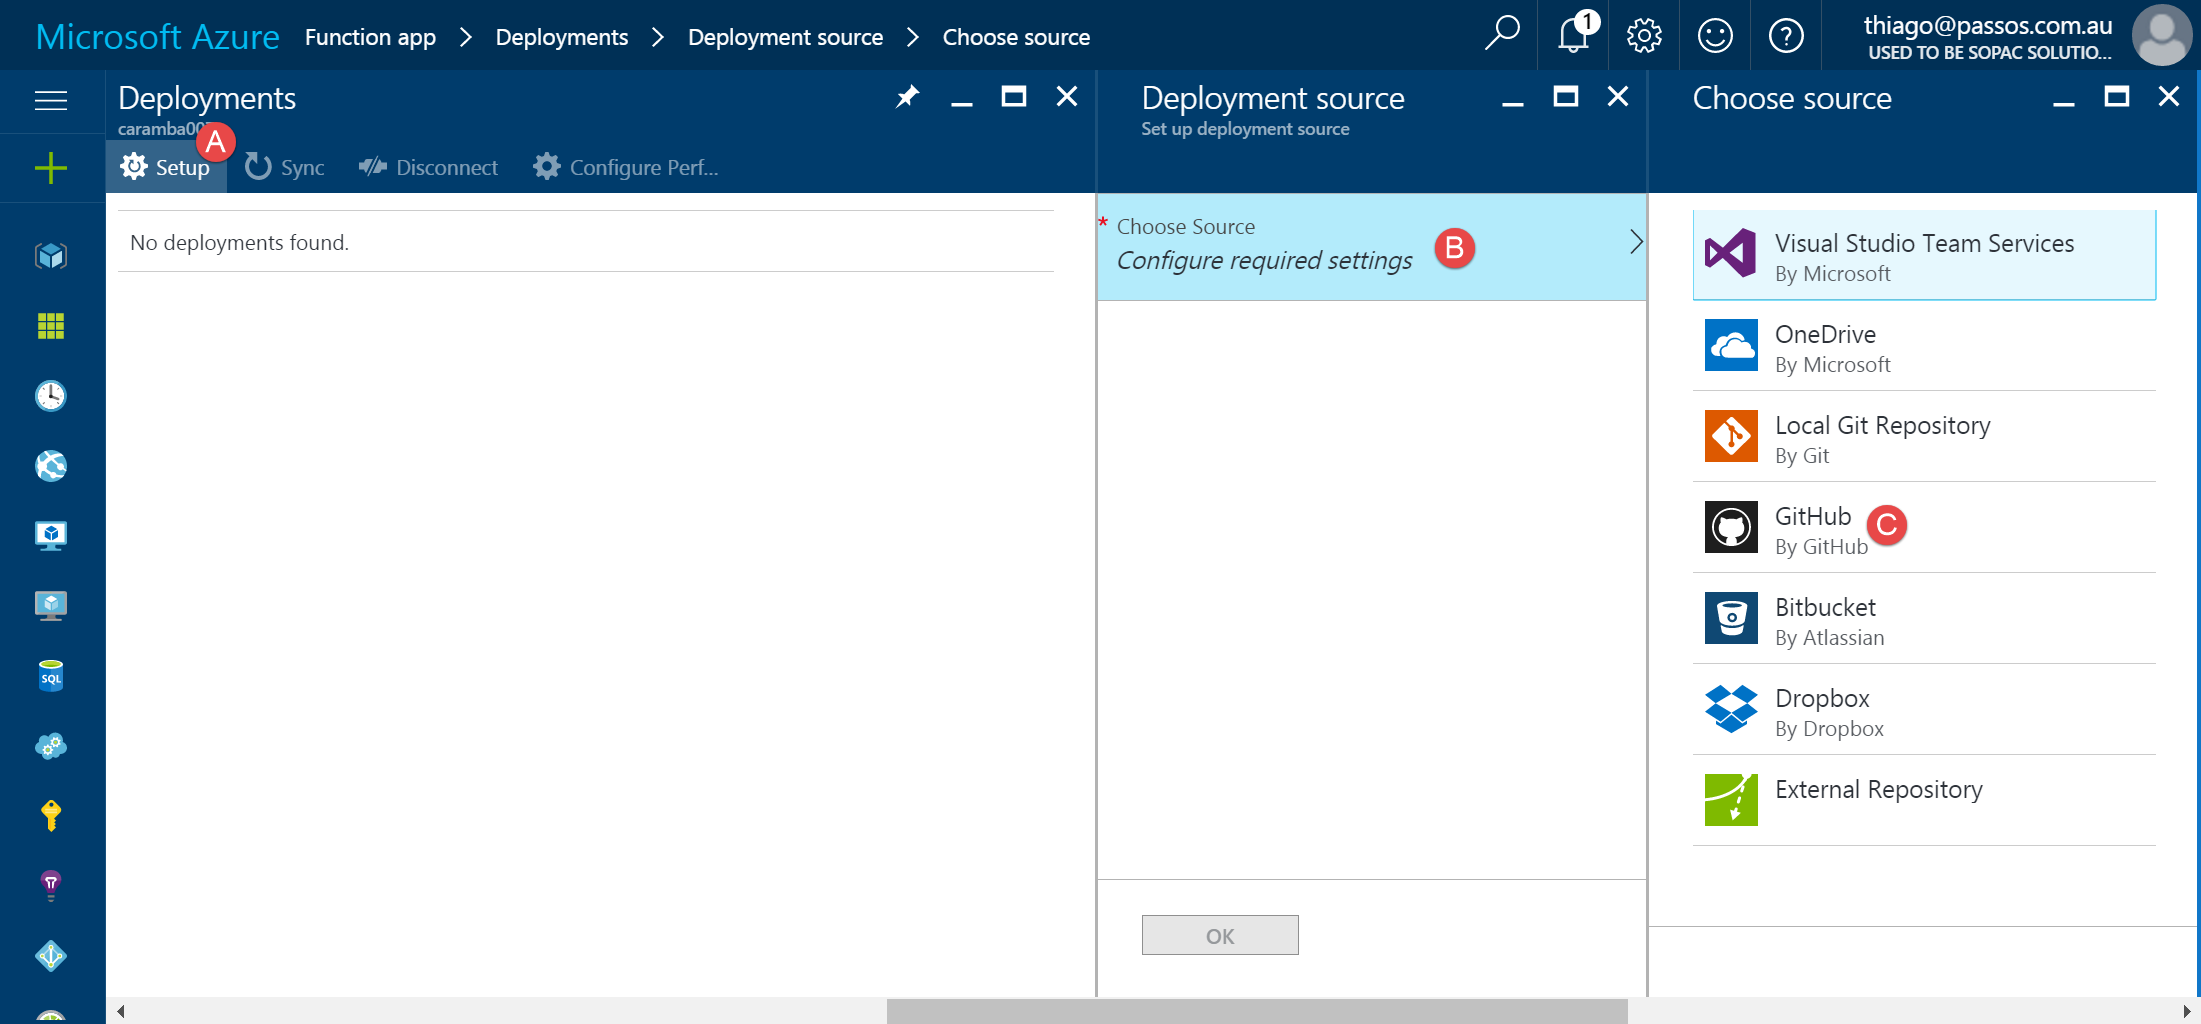
Configure Continuous Deployment
Once the Function App is provisioned it's time to configure Continuous Deployment.
Let's then configure the integration with GitHub
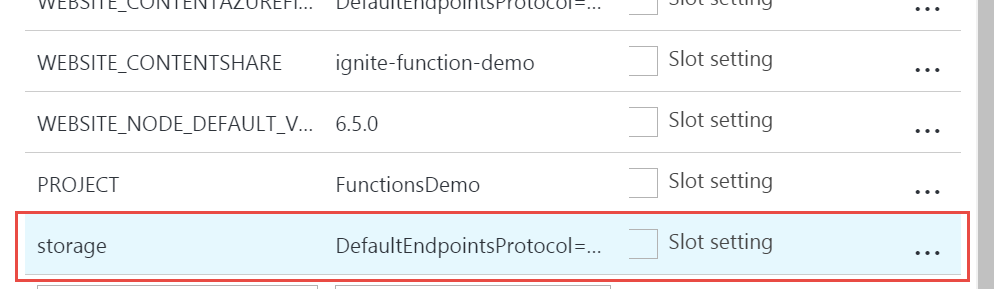
Here's a tip, for the deployment to work properly we have to configure the project name in the App Settings. Create a new entry called PROJECT and set the value with the name of the Azure Functions Project in Visual Studio, in my case it's FunctionsDemo

Create a new Storage Queue
Let's now open the Azure Storage Explorer and connect to our account. Once connected, I'll create a new Storage Queue. Up to this point, Azure hasn't provided a way to create a Storage Queue using the Portal. Also make sure you're in the same region as the Function App.

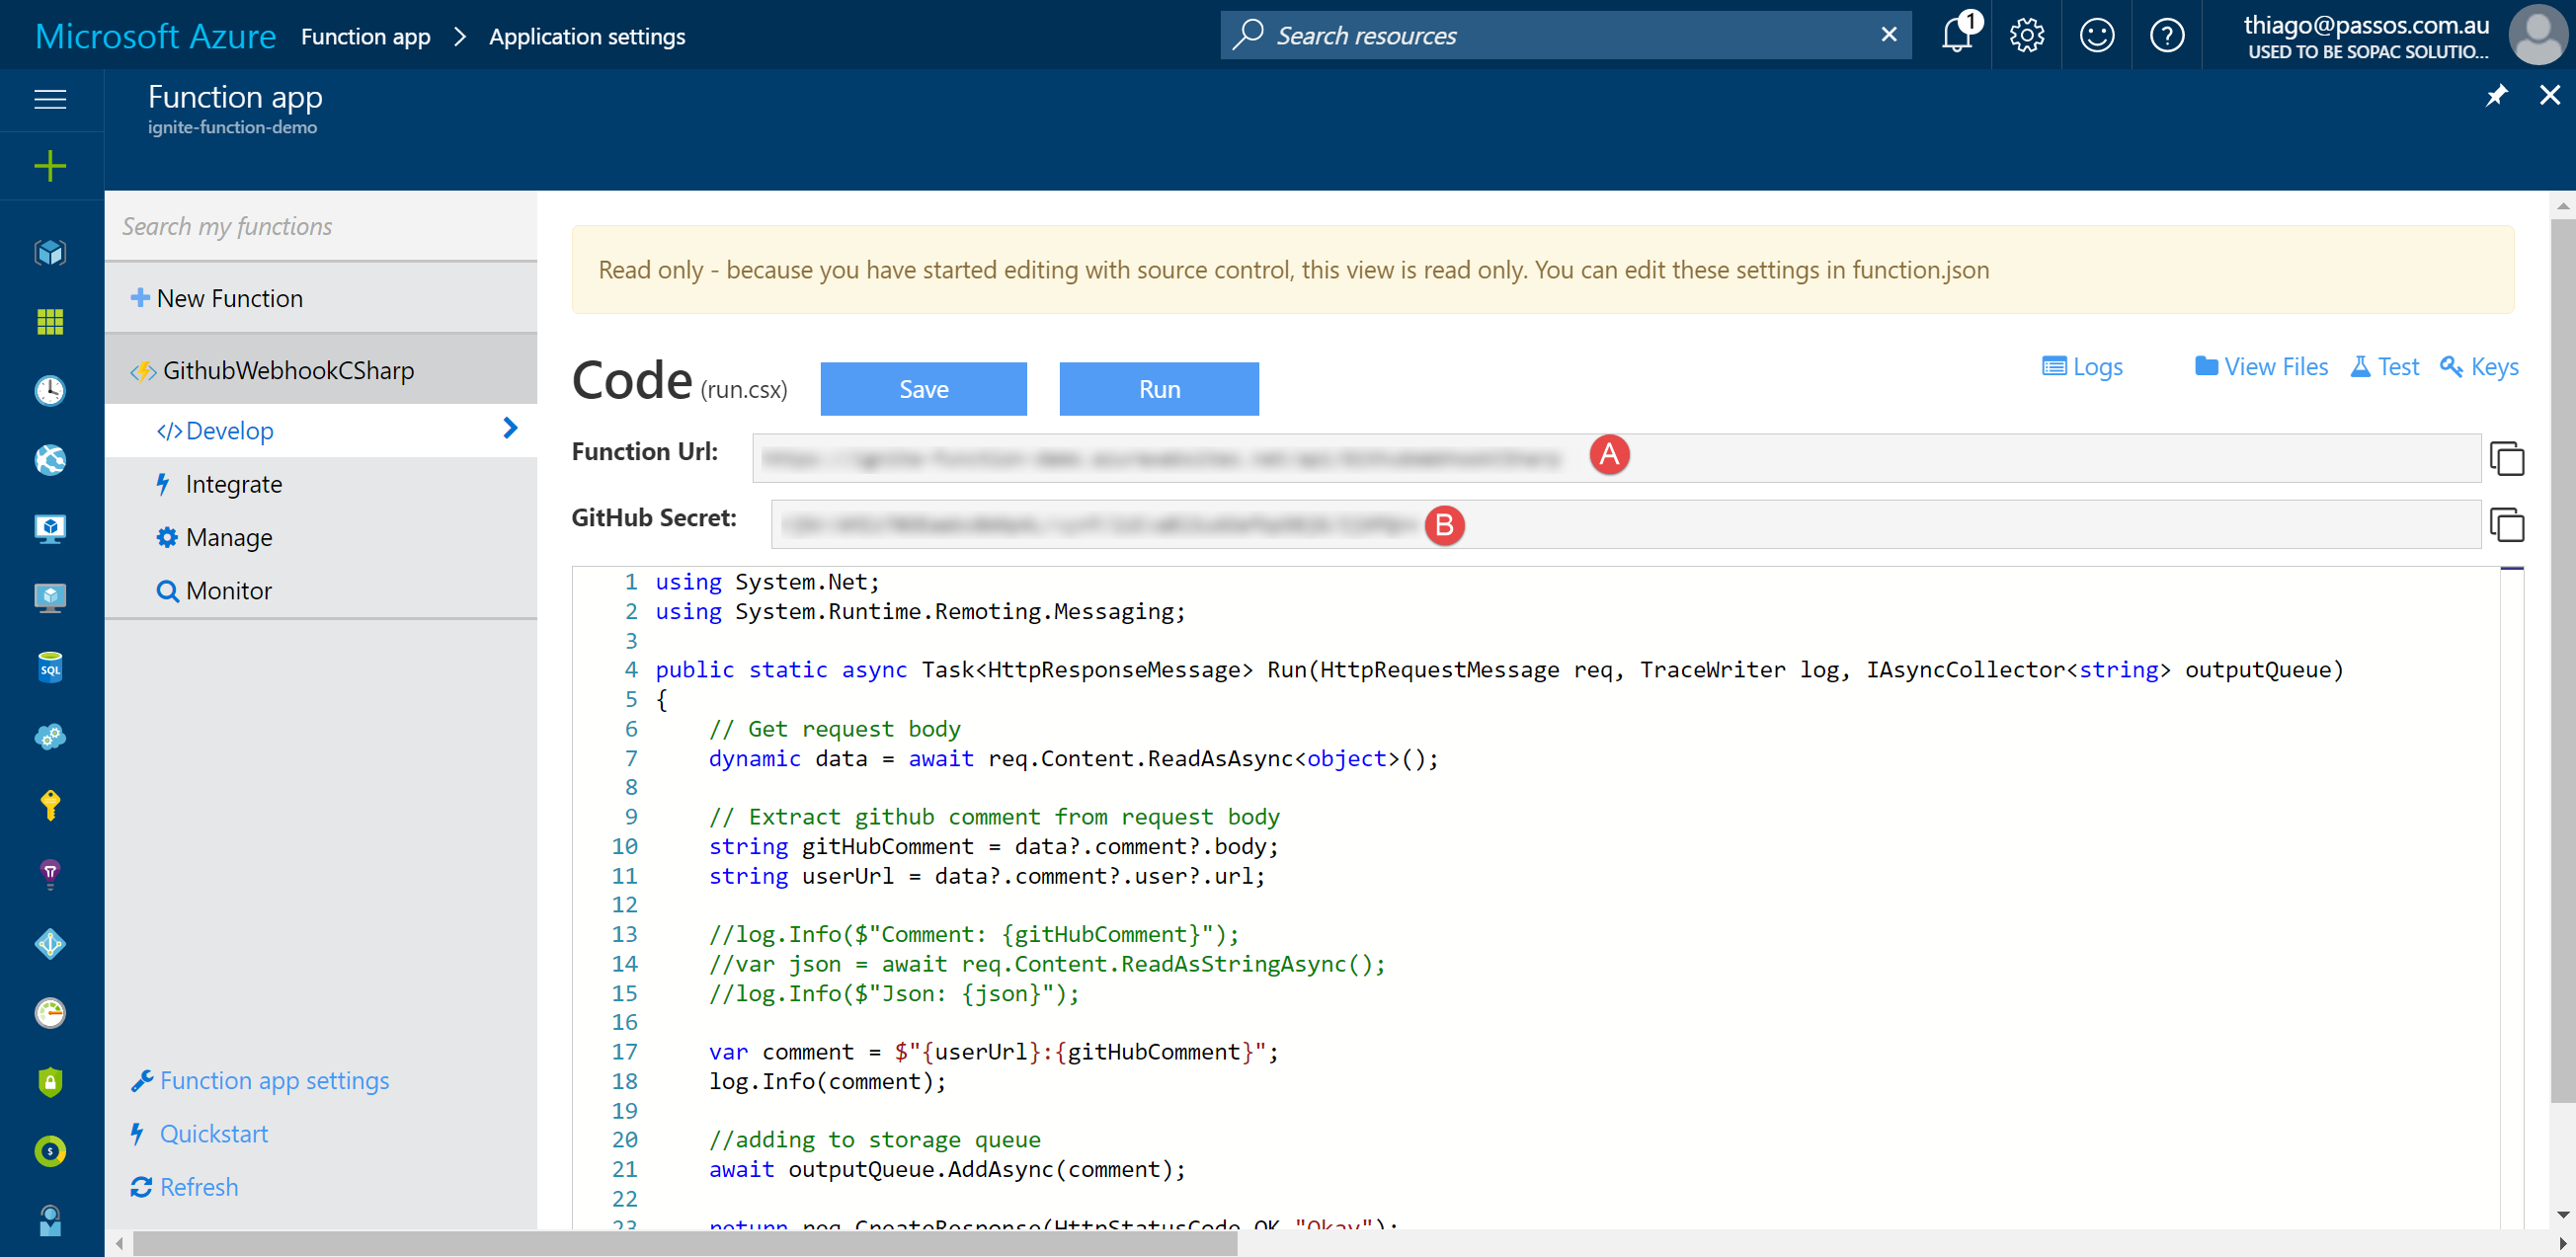
Configure GitHub to call your Webhook
First we'll get some details from the Function App (Function Url and GitHub Secret)
Now let's switch back to GitHub to setup the webhook there:
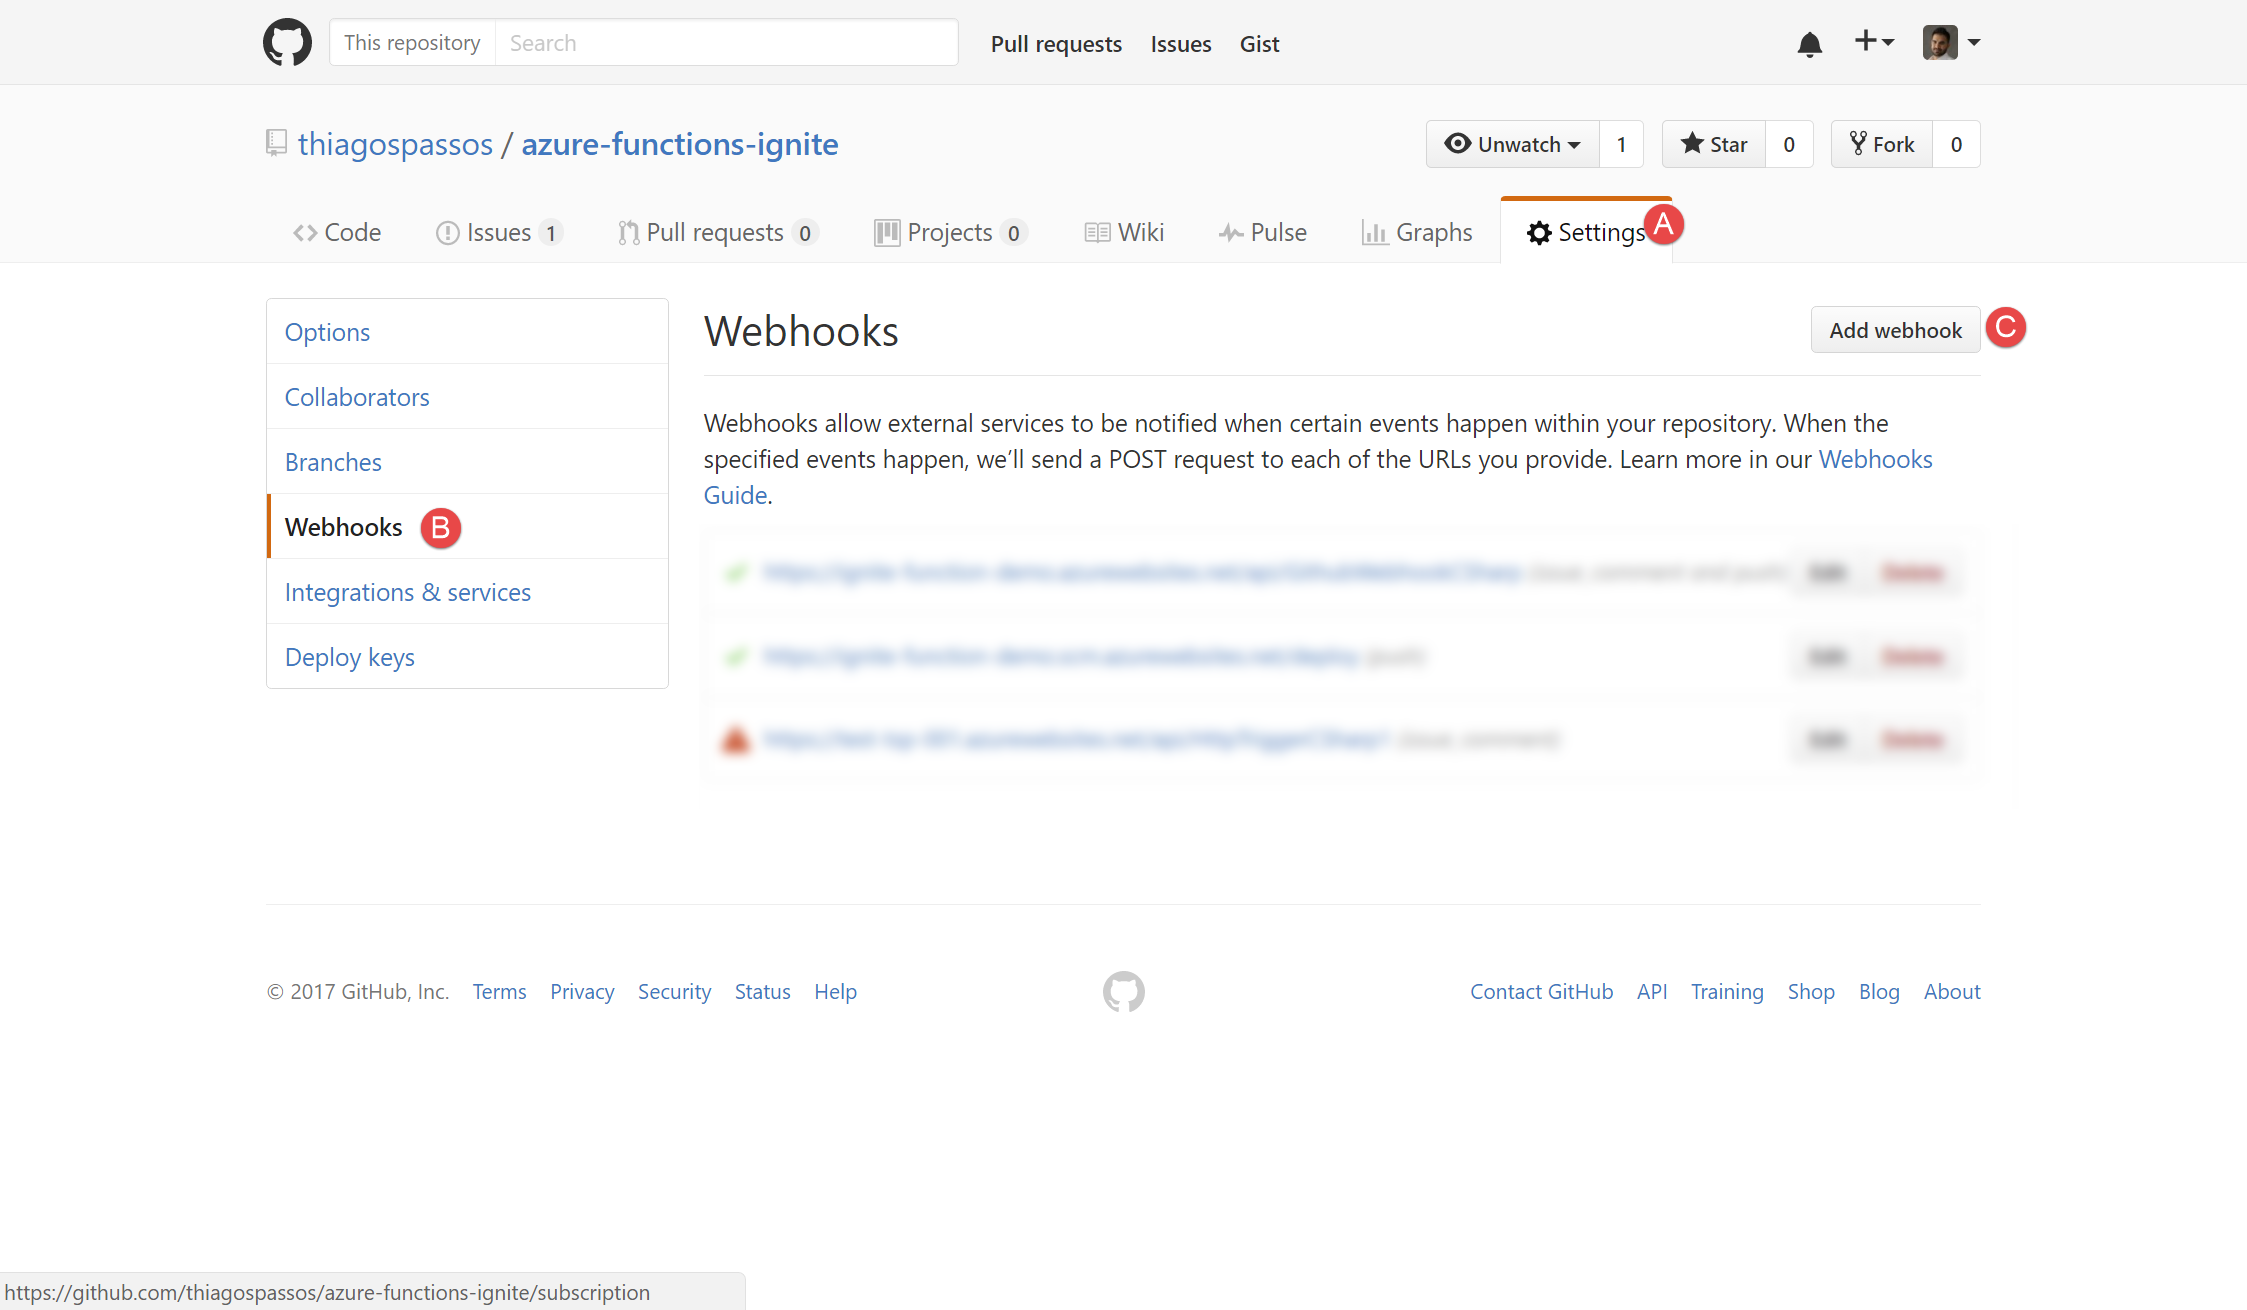
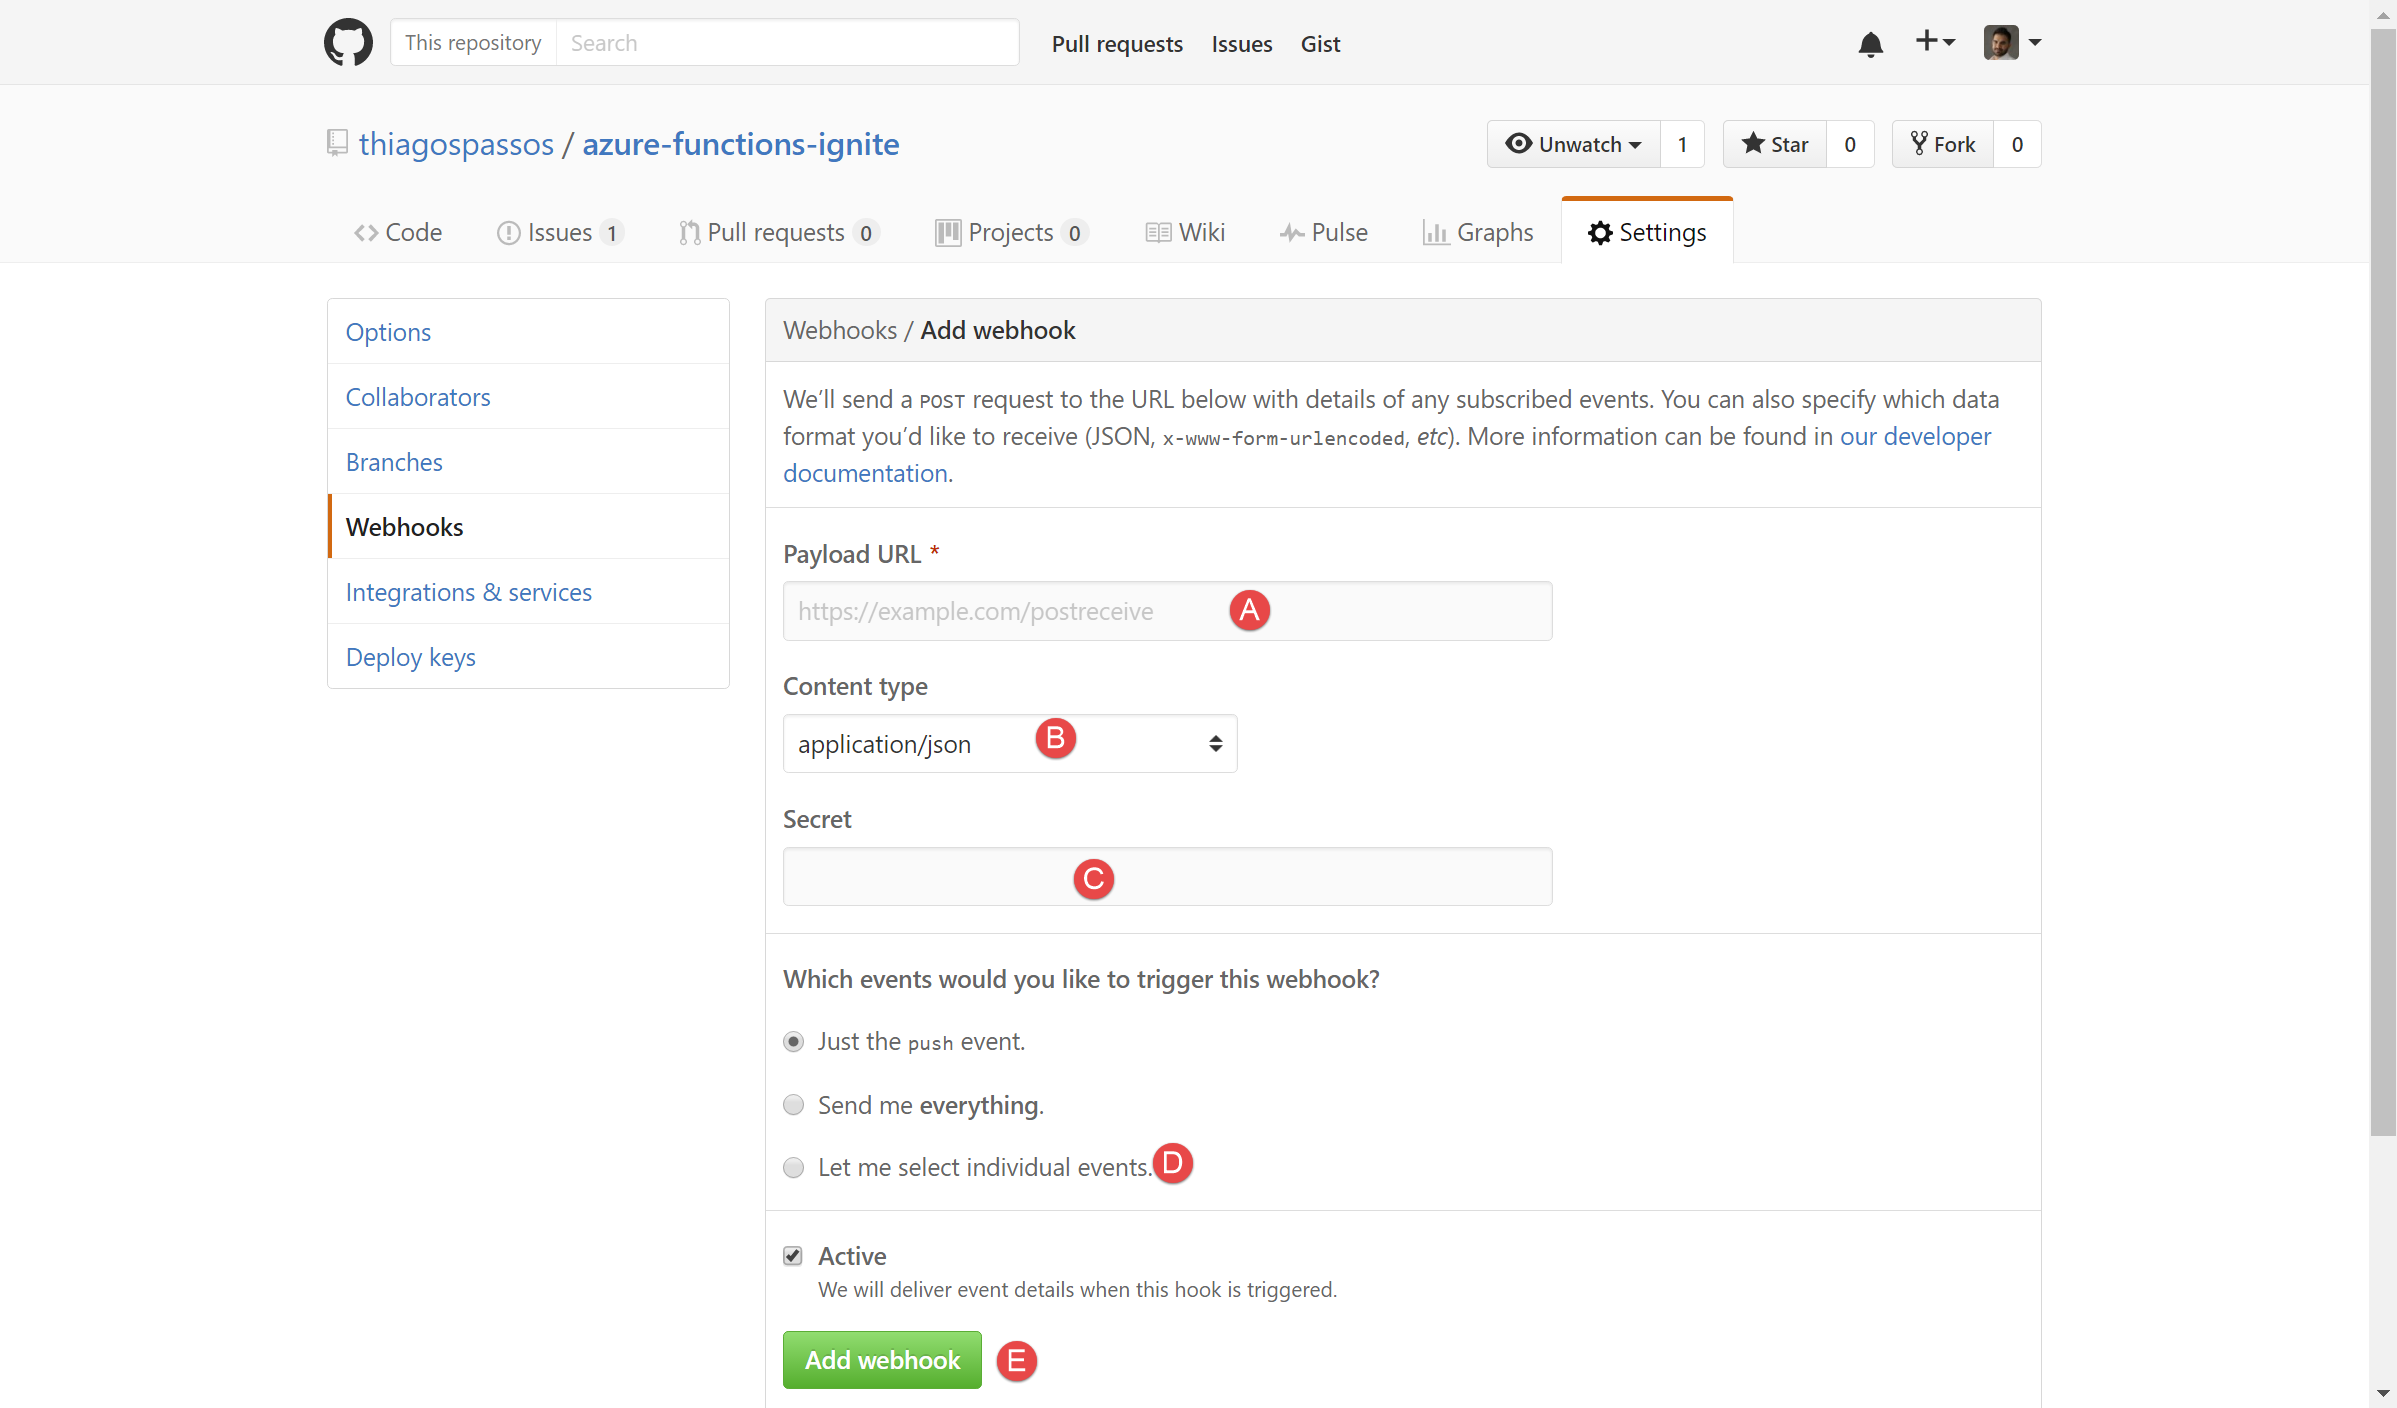
Populate the Payload URL, Content Type, Secret and also select Let me select individual events then select Issue comments, then click on Add webhook
Cool! We're ready to go.
Configure Azure to queue entry
Now we'll change a bit the solution so we post the comment coming from a GitHub issue into a Storage Queue. Since we've configured continuous deployment, any change we make to the project and commit back to GitHub will be automatically pushed to Azure.
Back to Visual Studio, we're going to update the function.json file to add a new binding.
{
  "type": "queue",
  "name": "outputQueue",
  "queueName": "ignite",
  "connection": "storage",
  "direction": "out"
}
Where outputQueue is the name of the parameter we're going to use in the function, ignite is the name of the queue we created in the step Create a new Storage Queue and storage is the connection string name we are going to add to the application settings.
In the run.csx file, we will update a few things:
using System.Net;
using System.Runtime.Remoting.Messaging;

public static async Task<HttpResponseMessage> Run(HttpRequestMessage req,
   TraceWriter log, IAsyncCollector<string> outputQueue)
{
    // Get request content
    dynamic data = await req.Content.ReadAsAsync<object>();

    // Extract github comment from request body
    string gitHubComment = data?.comment?.body;
    string userUrl = data?.comment?.user?.url;

    var comment = $"{userUrl}:{gitHubComment}";
    // This is just for logging purpose
    log.Info(comment);

    //adding to storage queue
    await outputQueue.AddAsync(comment);

    return req.CreateResponse(HttpStatusCode.OK,"Okay");
}
The main things here are adding the IAsyncCollector<string> outputQueue parameter (if you want to write a synchronous function you can use ICollector<string> outputQueue instead). Then adding the comment to the queue calling await outputQueue.AddAsync(comment); (If sync: outputQueue.Add(comment);)
Now we need configure the storage connection string. First let's open Azure Storage Explorer and copy the connection string from the Storage Account we created our queue in:
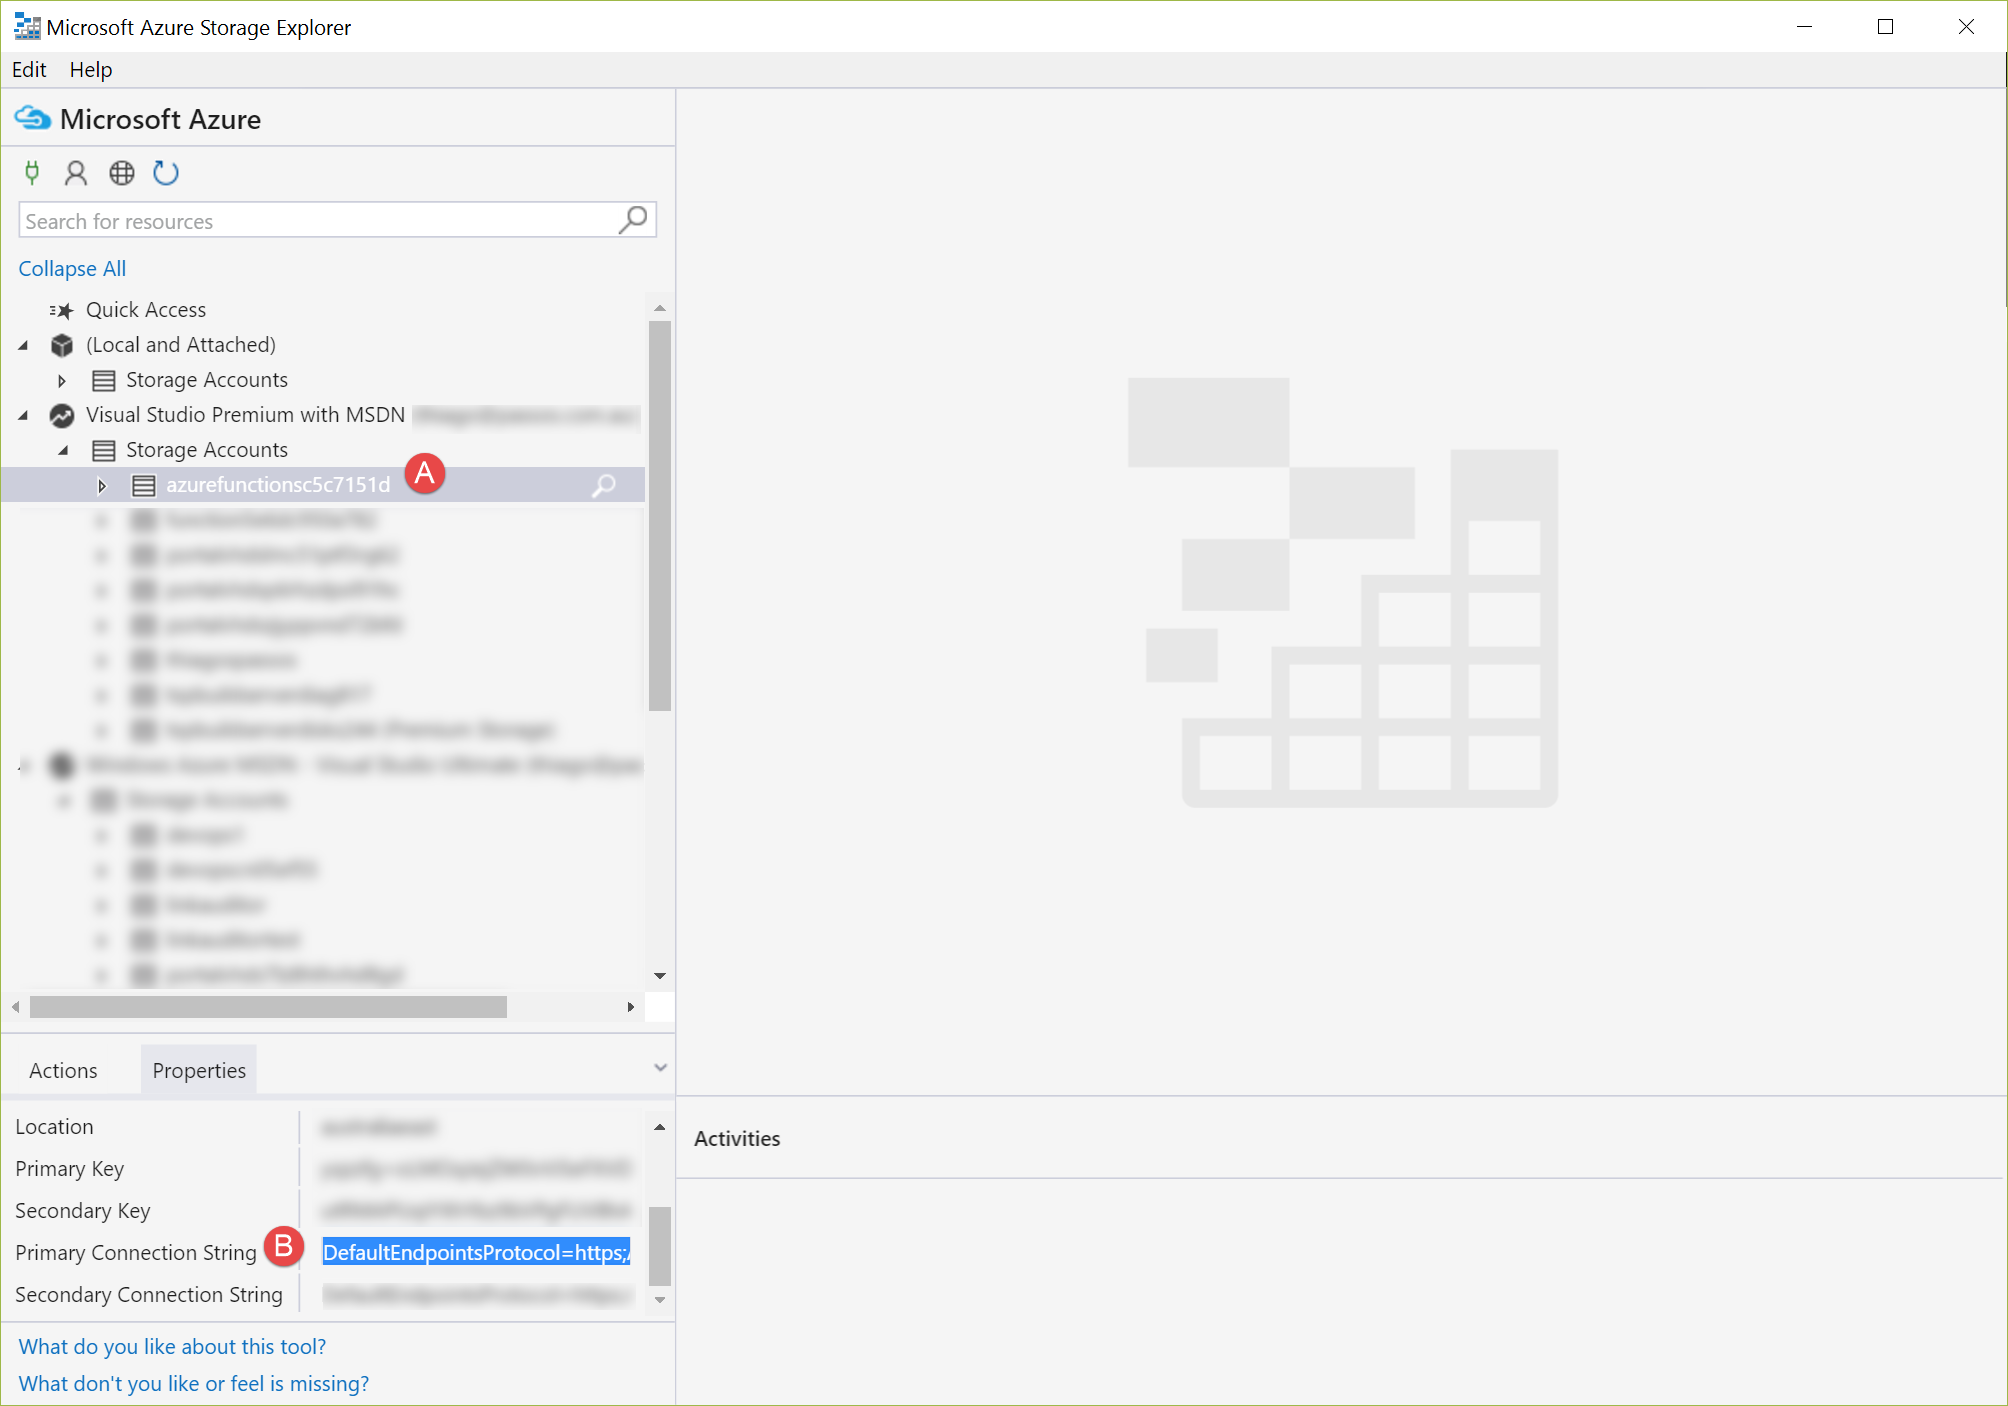
Then we'll jump back to the Azure Portal to set the app settings. Follow the same steps from Create a new Azure Function in the Azure Portal to add the PROJECT settings, but this time we'll add the storage key and we'll paste the connection we copied from the Storage Explorer
Running Through
All done. Let's now run through the whole process and check if everything is working as expected.
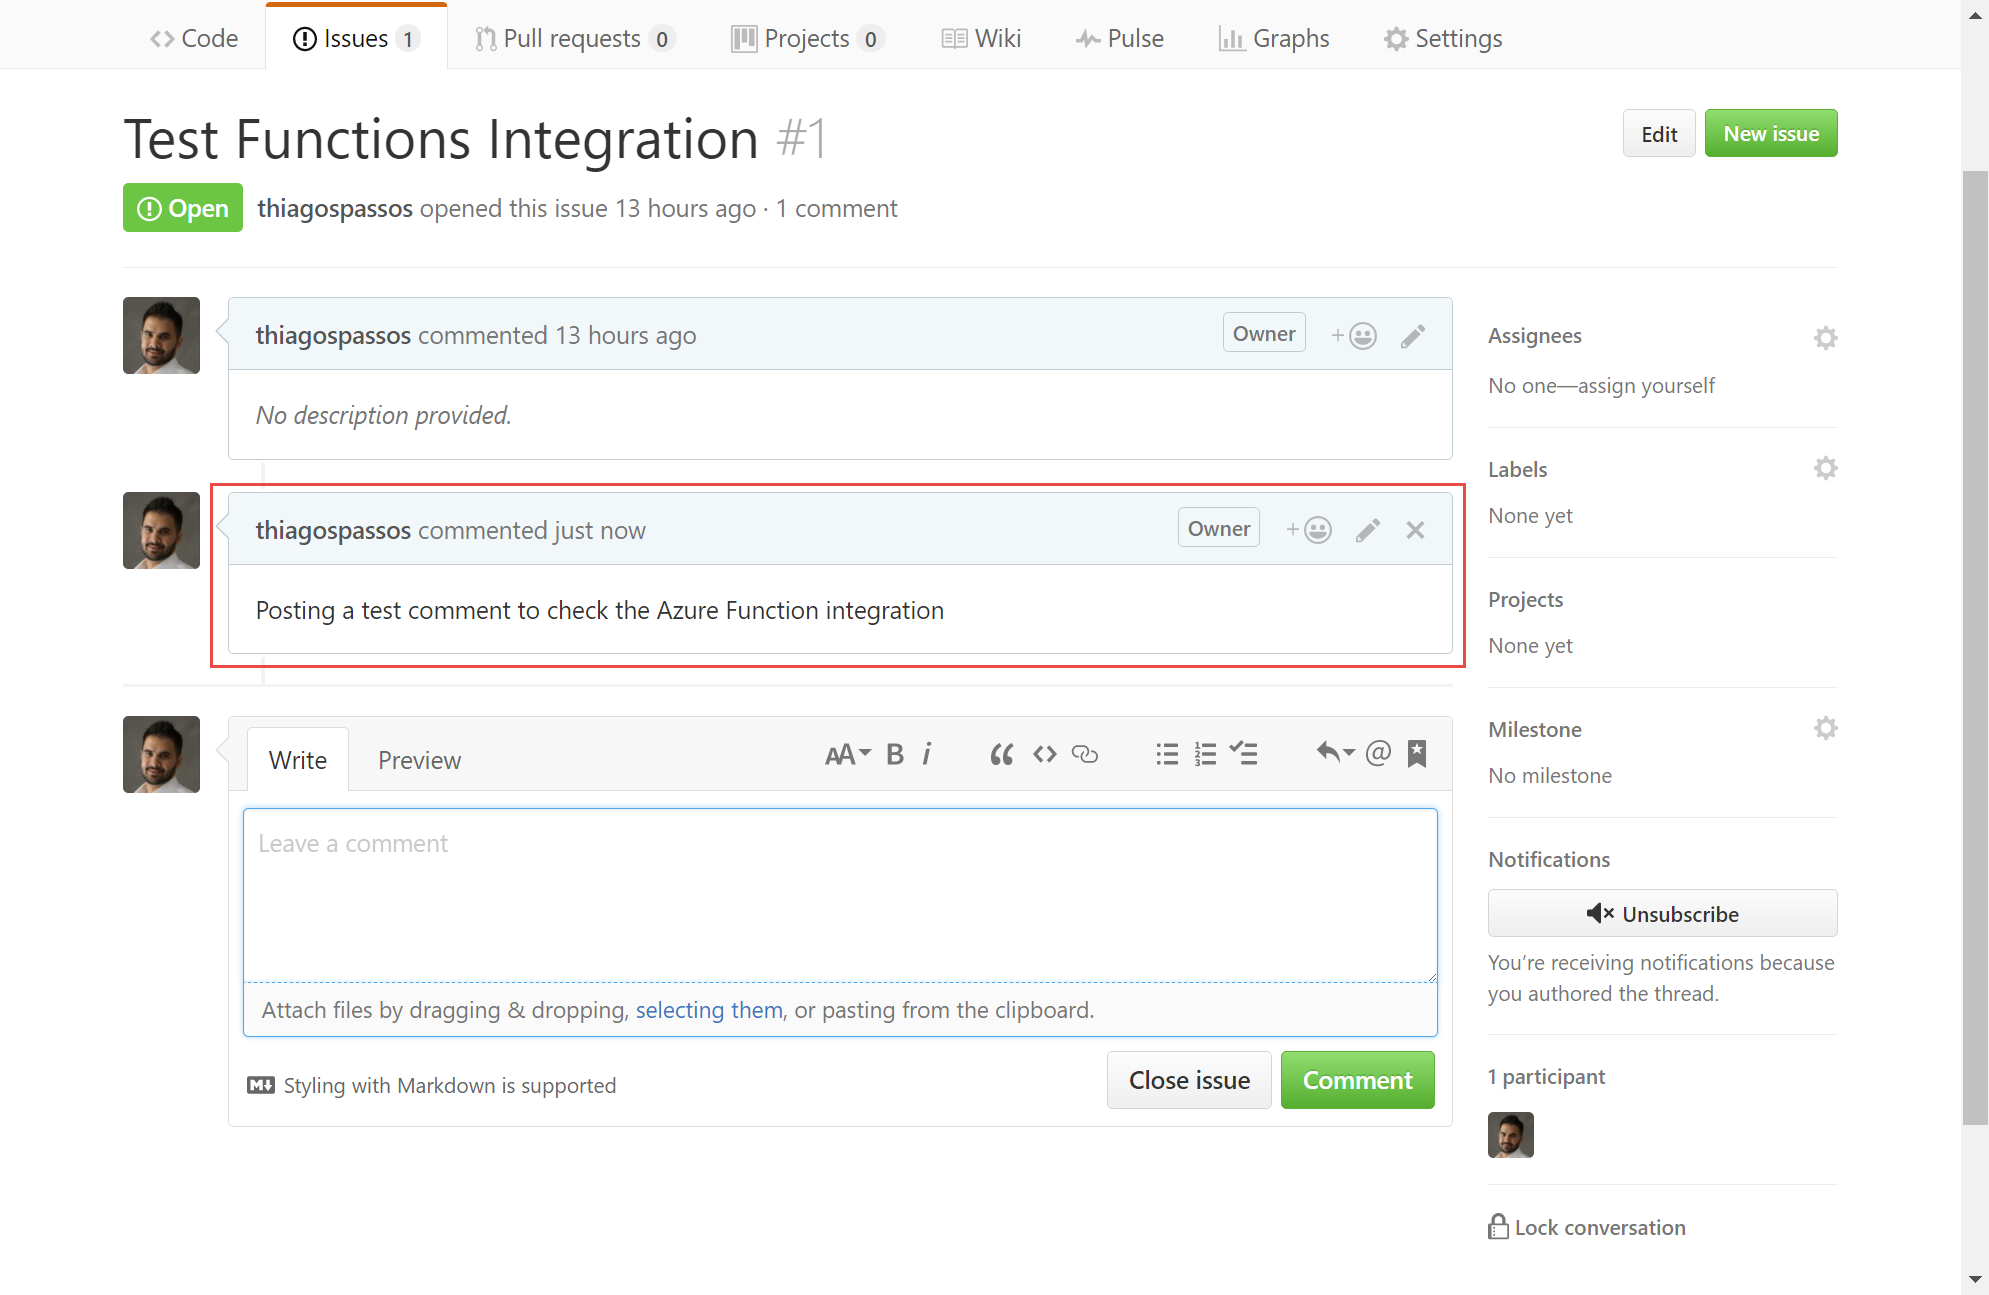
In my GitHub repository I've added a new comment to an existing issue:
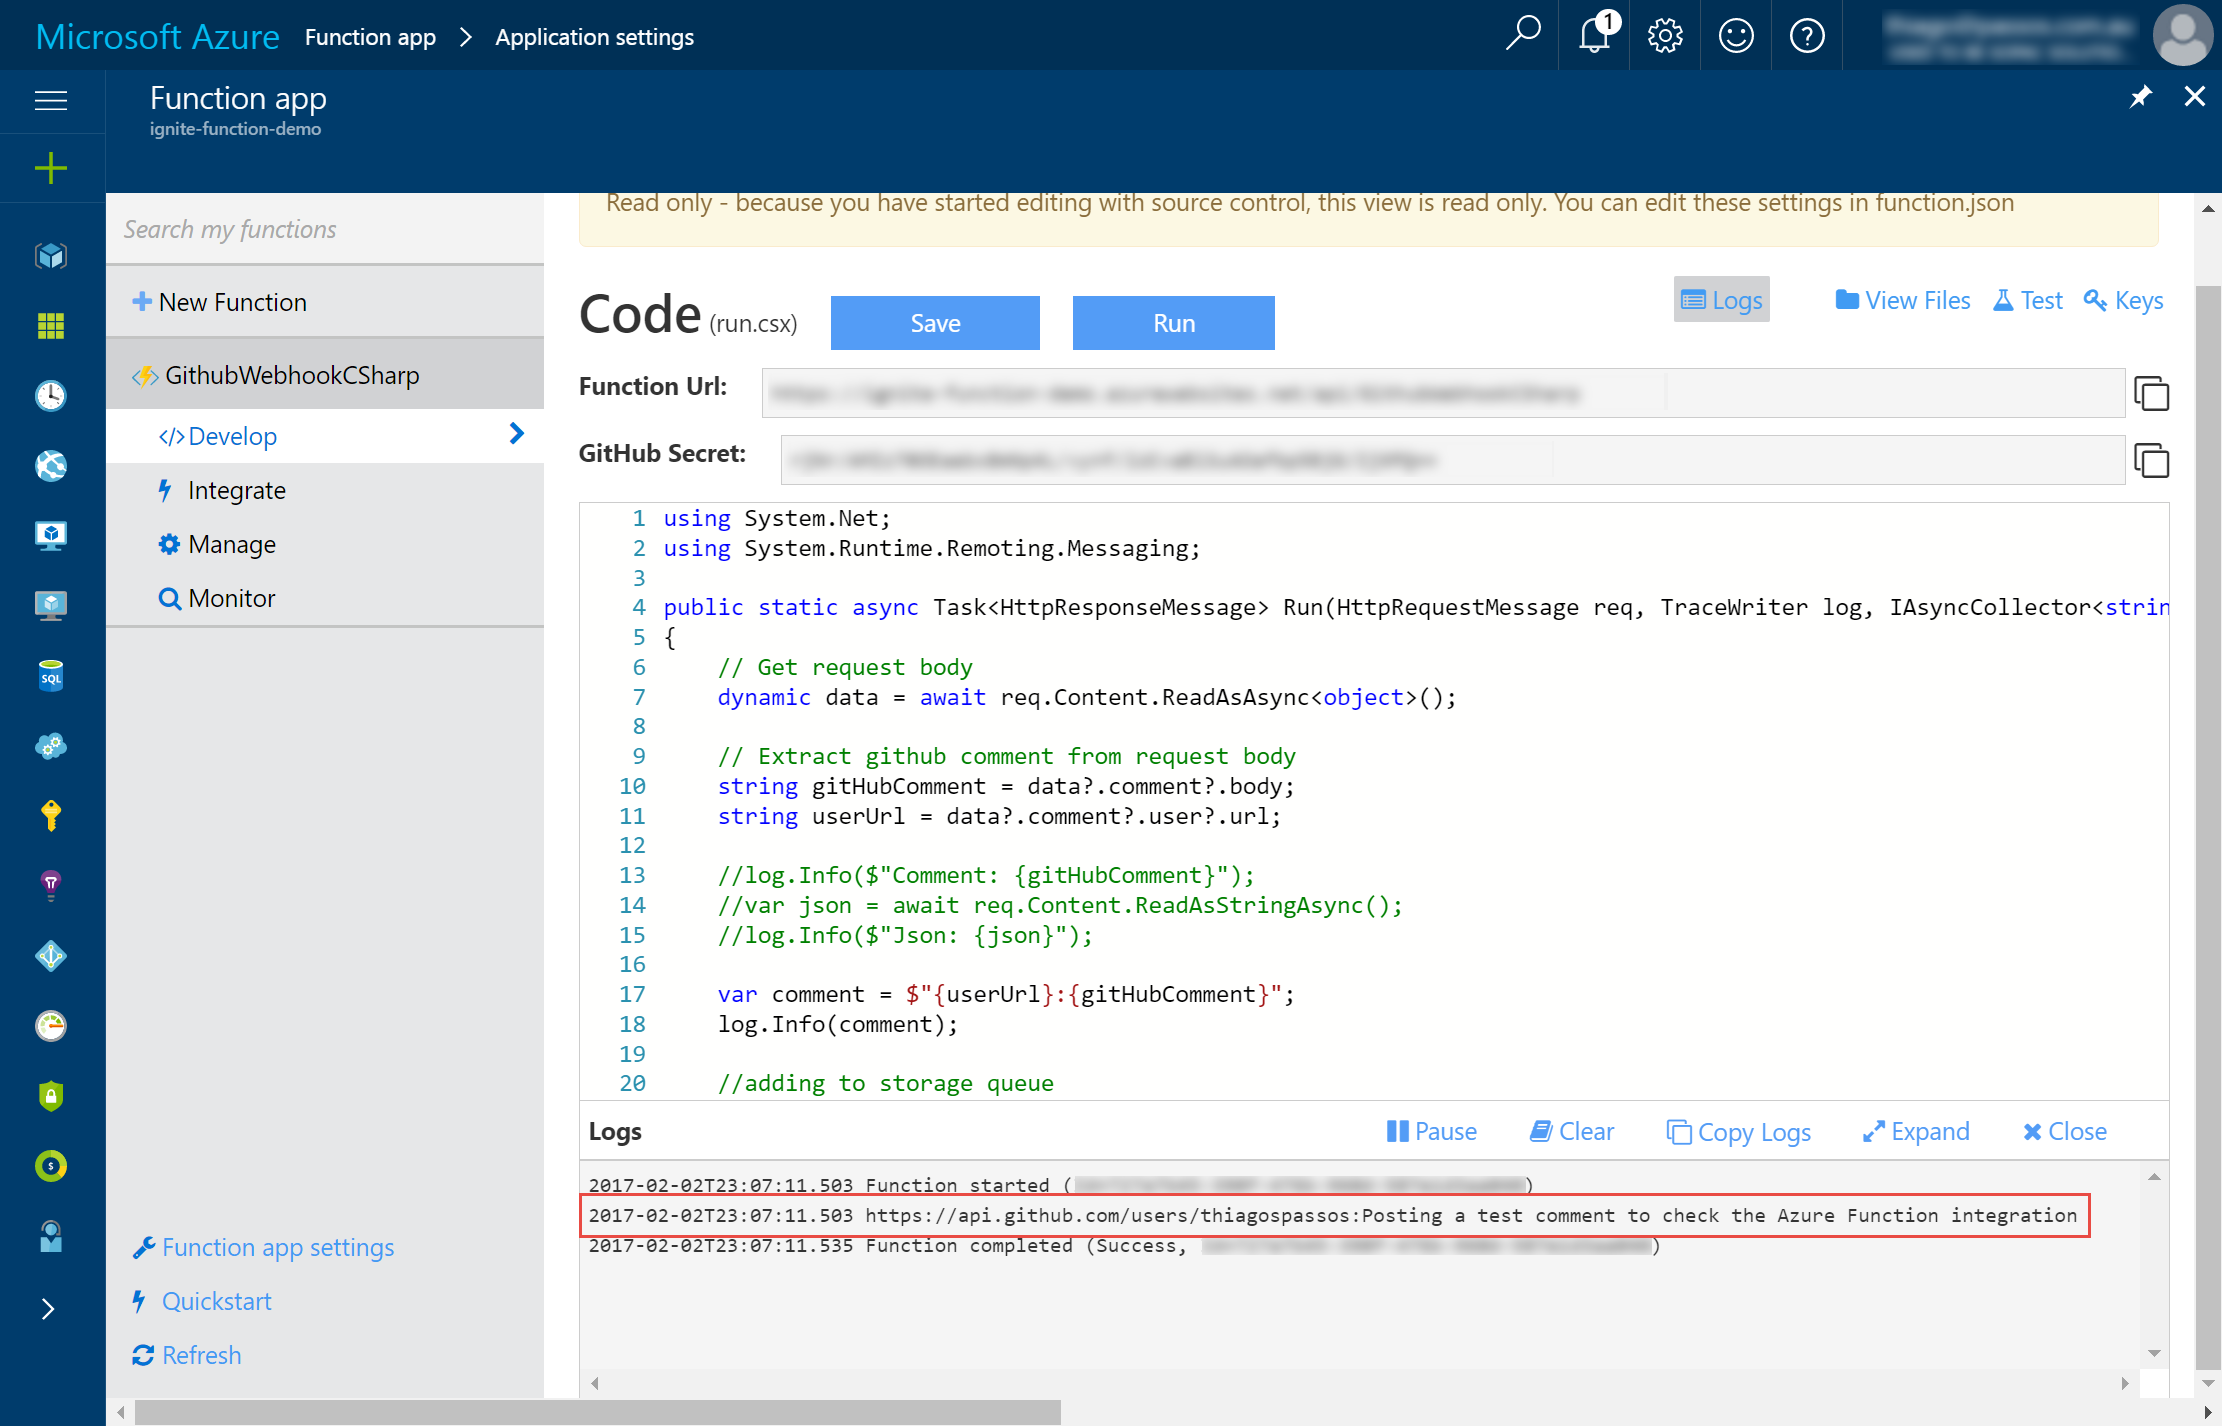
In my Azure Functions log, I can see the comment coming through:
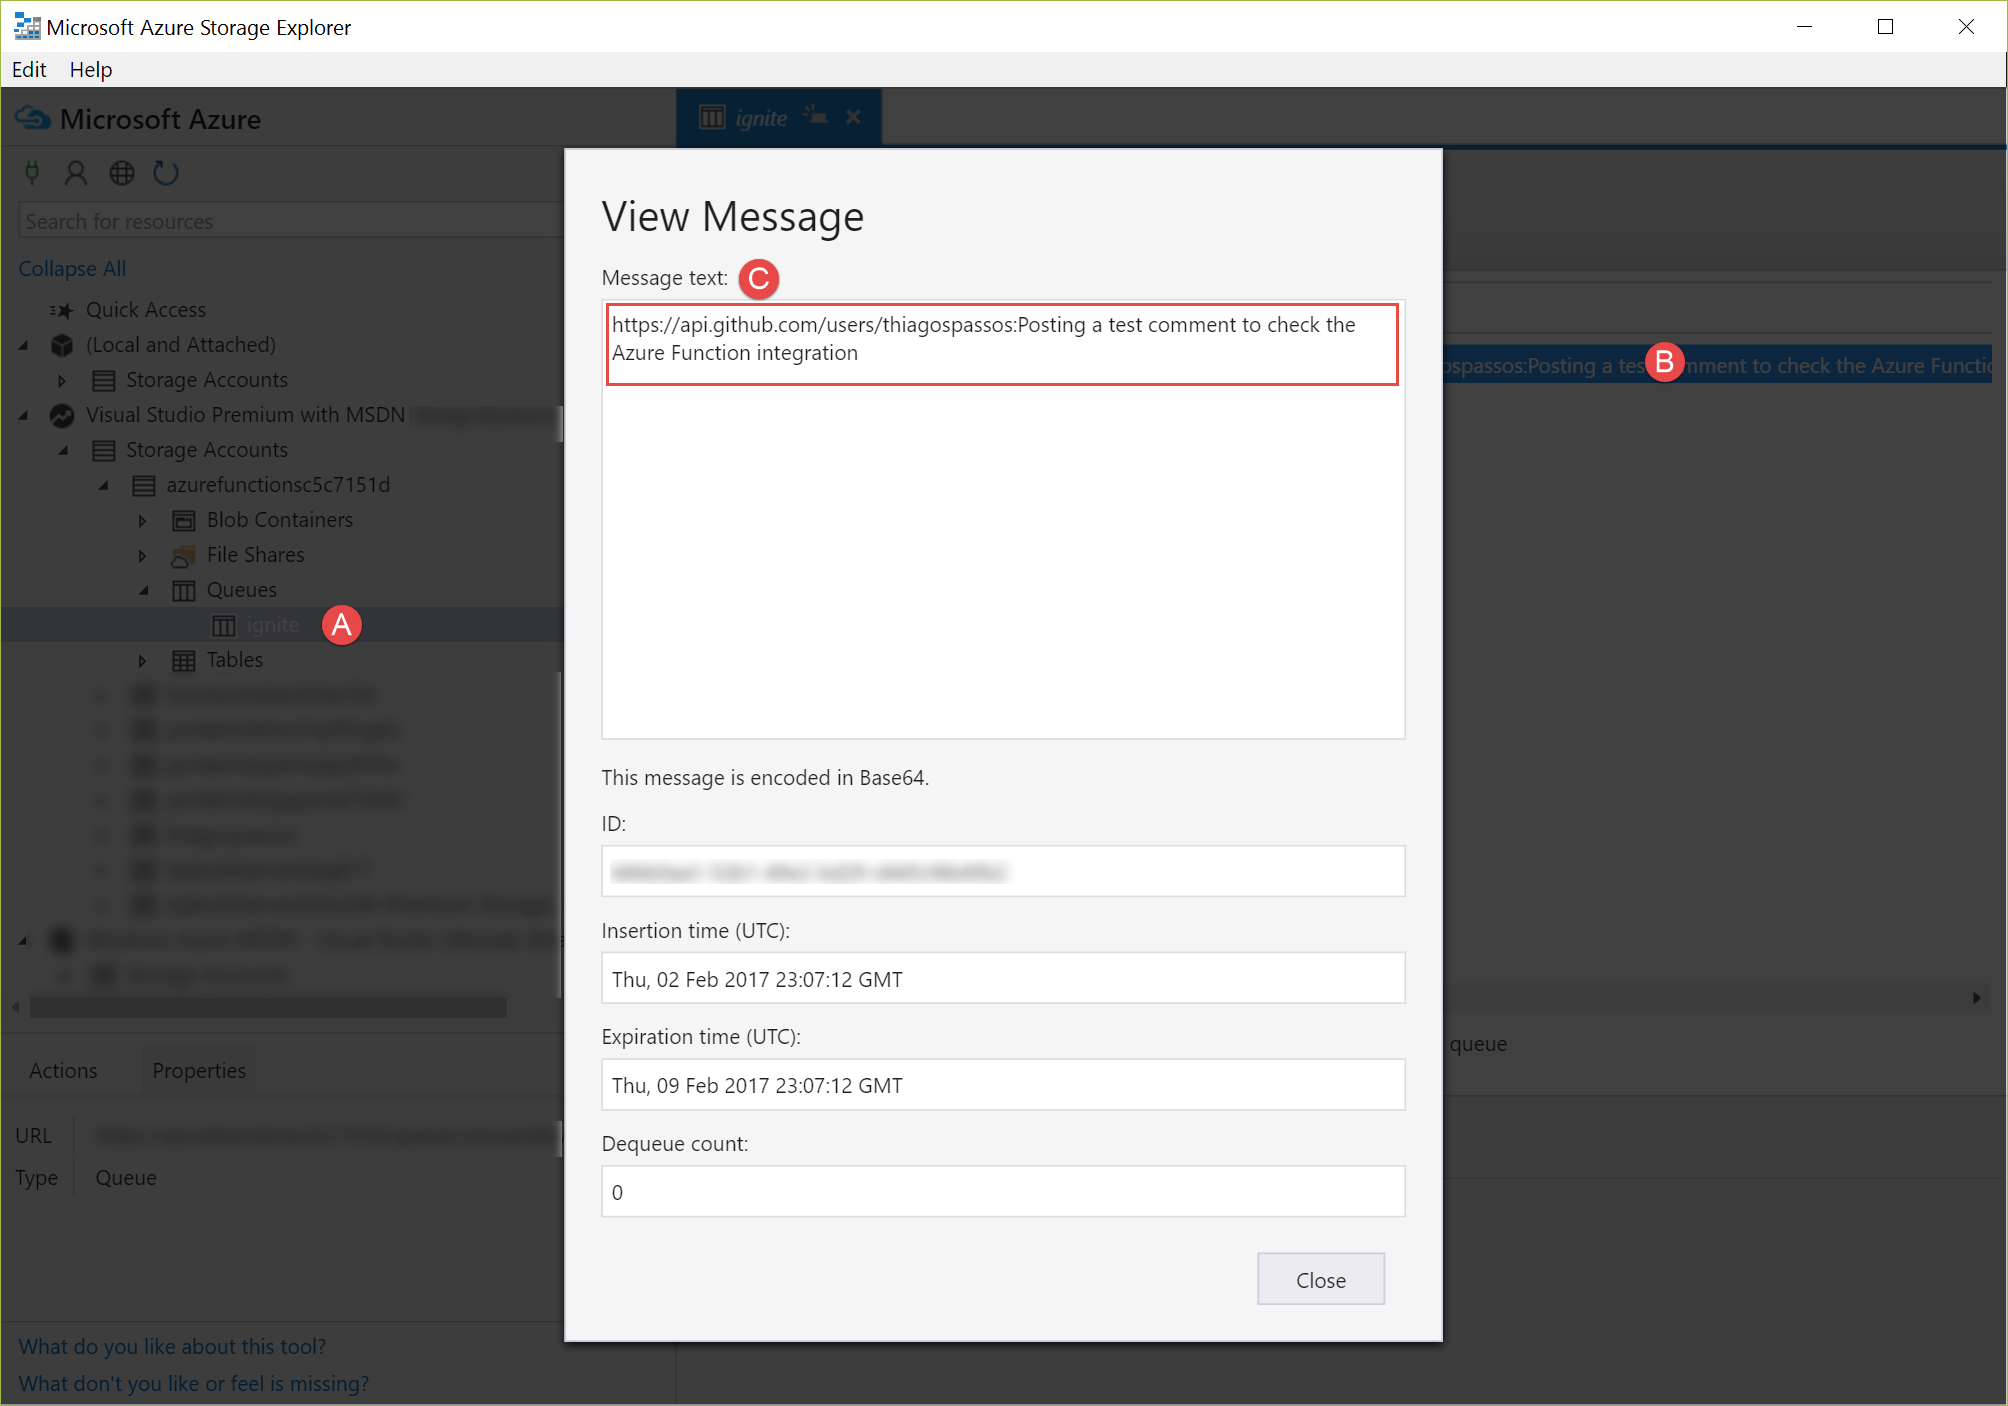
In the Azure Storage Explorer, I can see the comment added to my queue:
Awesome!!! Azure Functions is full of possibilities and this is only 2 of the several available integrations. Hope you liked it.
Cheers.