Azure Functions for the Enterprise + Setting up CI/CD Pipelines

In the last post, we talked about how to keep your API layer as slim as possible and then expose them through Azure Functions and I finished the post deploying to Azure using the frightful right-click publish. And as promised, this time we're going to go through the process of setting up your CI/CD pipelines.
The source code covered in this series is in this GitHub repository.
If you find it easier, you can follow the steps in the video below.
We're going to use Visual Studio Team Services (VSTS) for the CI/CD pipelines, if you do not have an account yet, I highly recommend, it's free for up to 5 users. Just go to visualstudio.com to get started.
Prerequisites
- Azure subscription, create a free account before you begin.
- VSTS account
- Git repository (it can be inside of VSTS or not, up to you)
Here are the steps we're going to follow:
1. Create a build pipeline
The screenshots are very self explainatory, but I'll comment on some of them.

Even though I'm using GitHub, you can chose whatever Git repository you want.

Keep in mind here that I'm using the version 2.0 of Azure Functions which supports .NET Core. If it's not your case, then this step will be different.

The only thing you need to customize in the build is the publish step, because, by default, it has the option Publish Web Projects checked which would NOT pick up your Azure Functions project.

2. Create a release pipeline
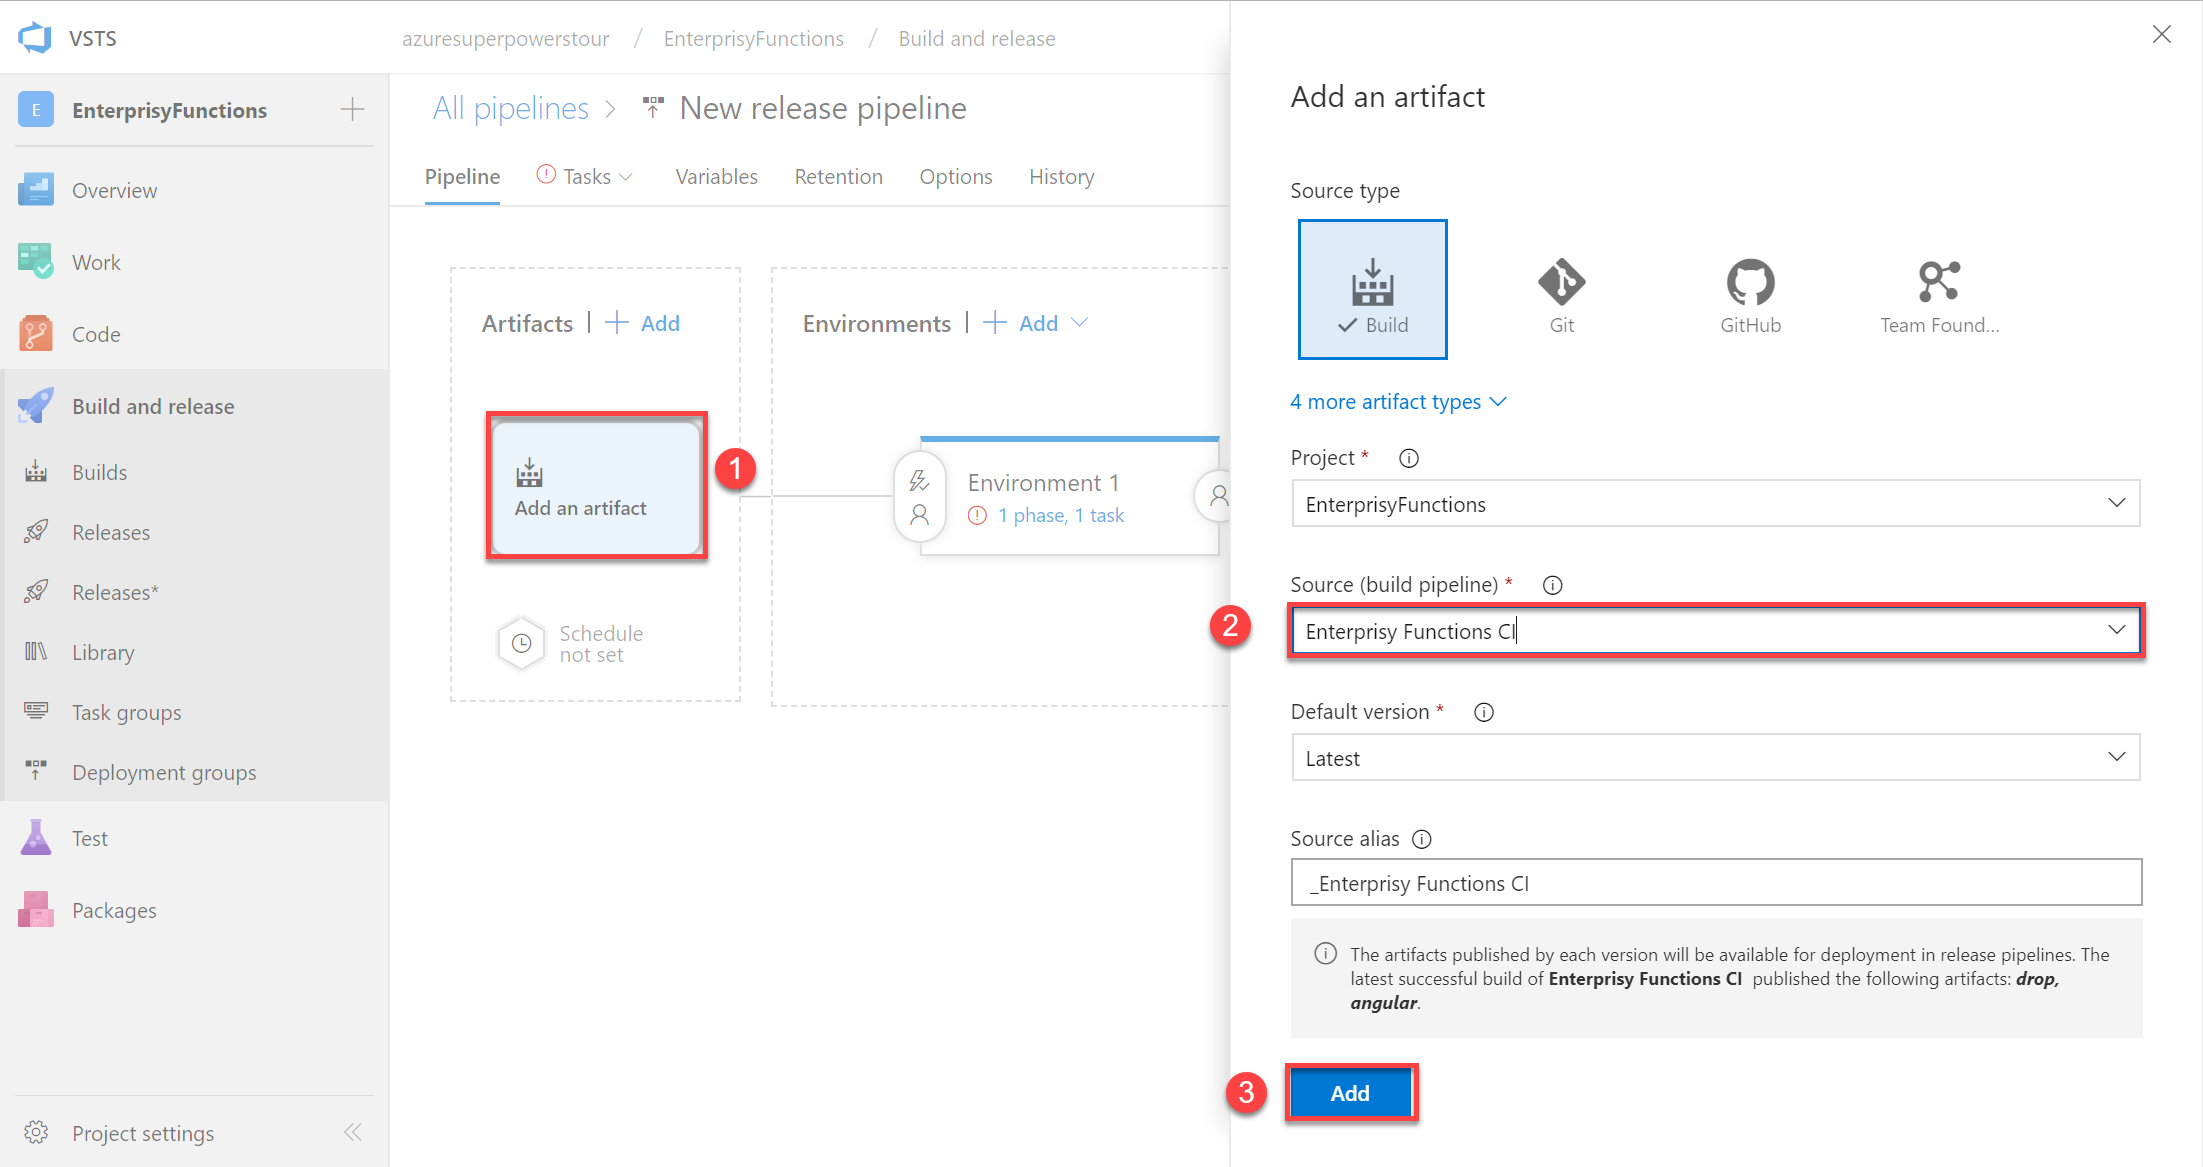
You're all done with your build pipeline, now it's time to create your release pipeline.


We're going to use as artifact what was generated in the build pipeline.

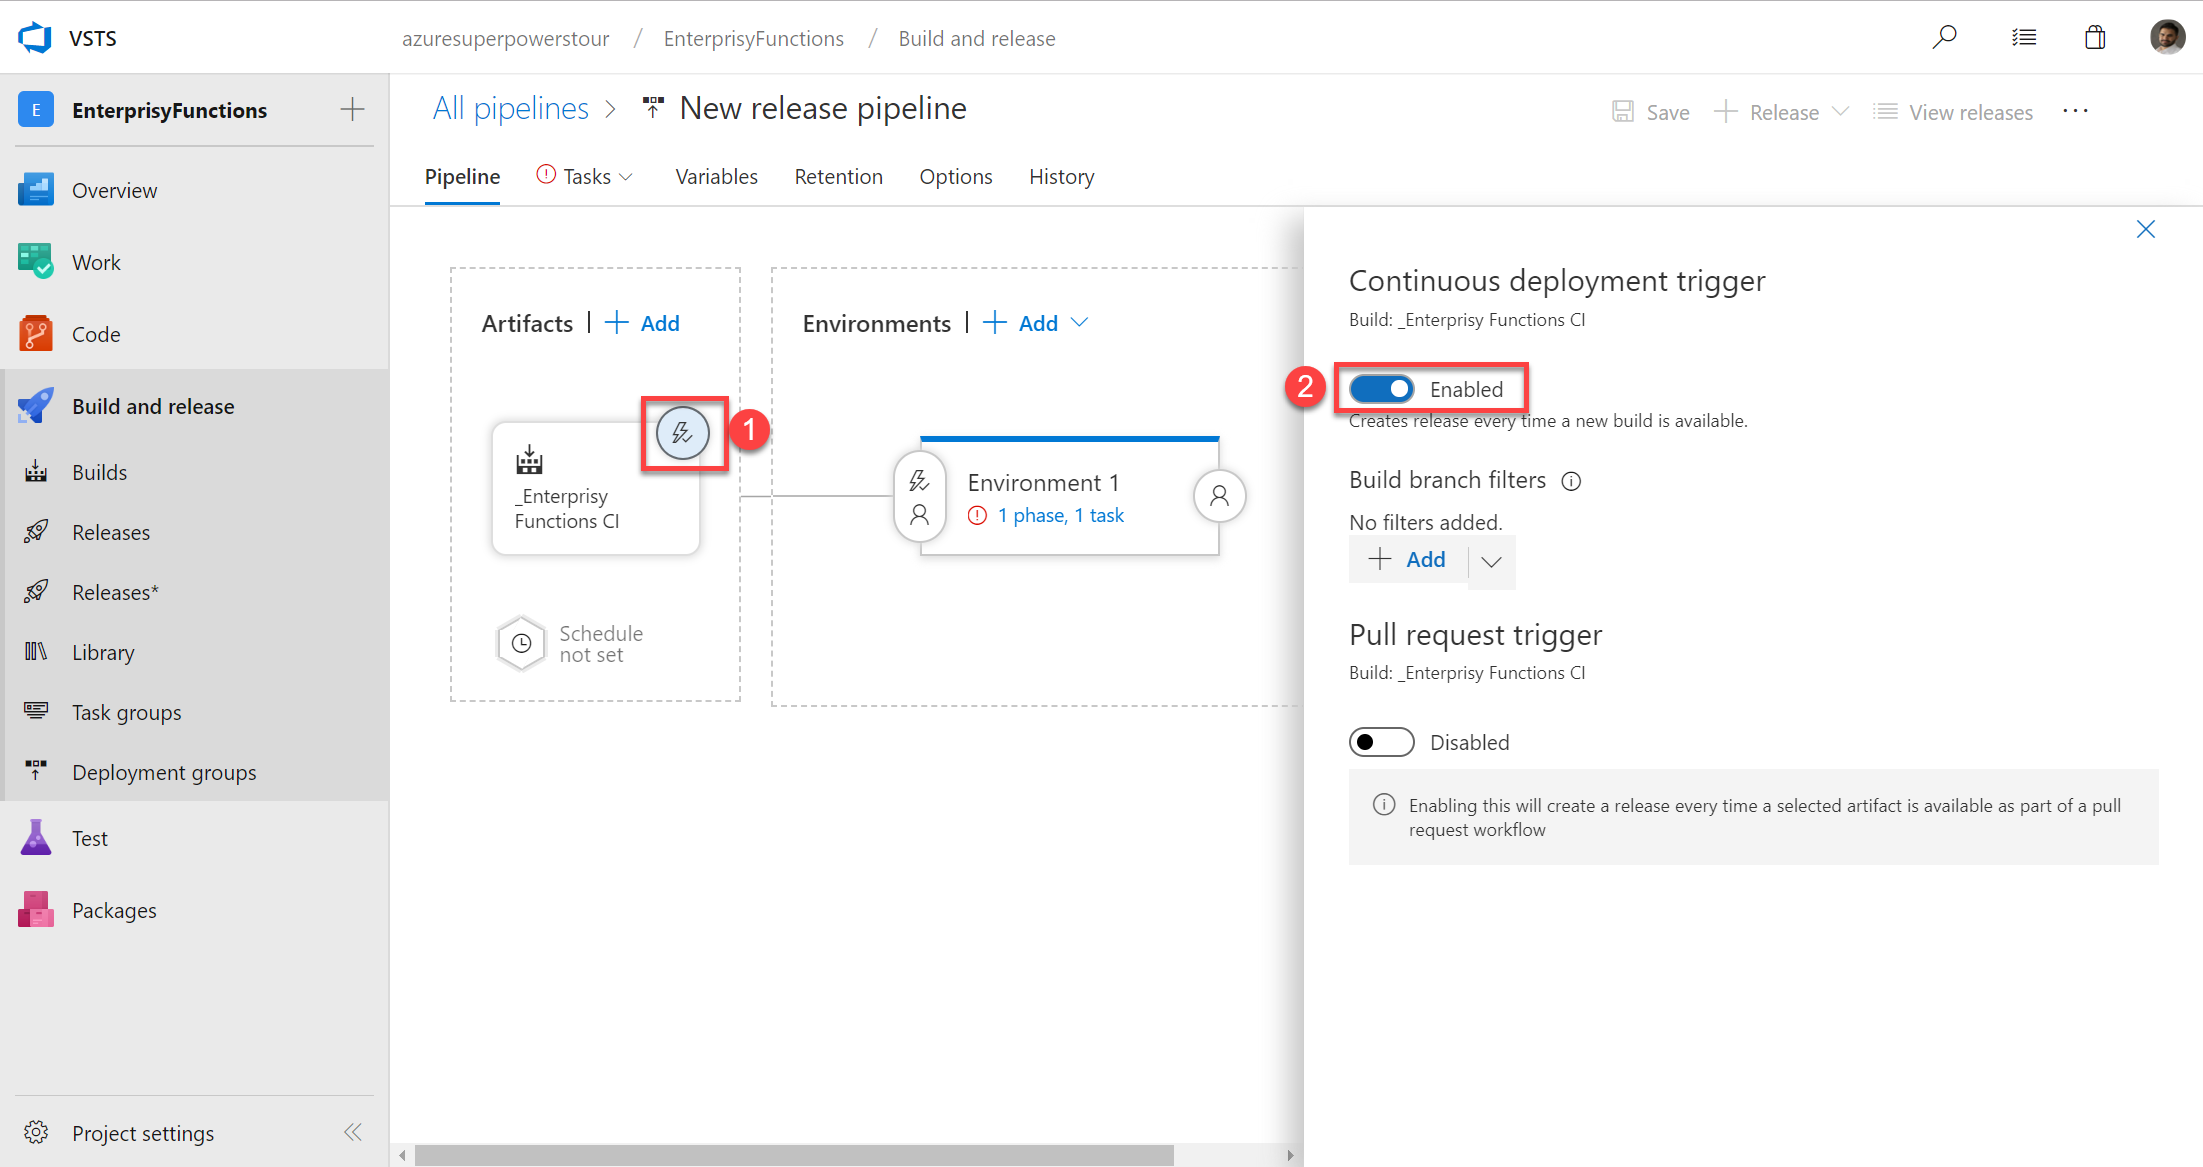
This step is not necessarly mandatory. You can chose to kick off the release pipeline manually.

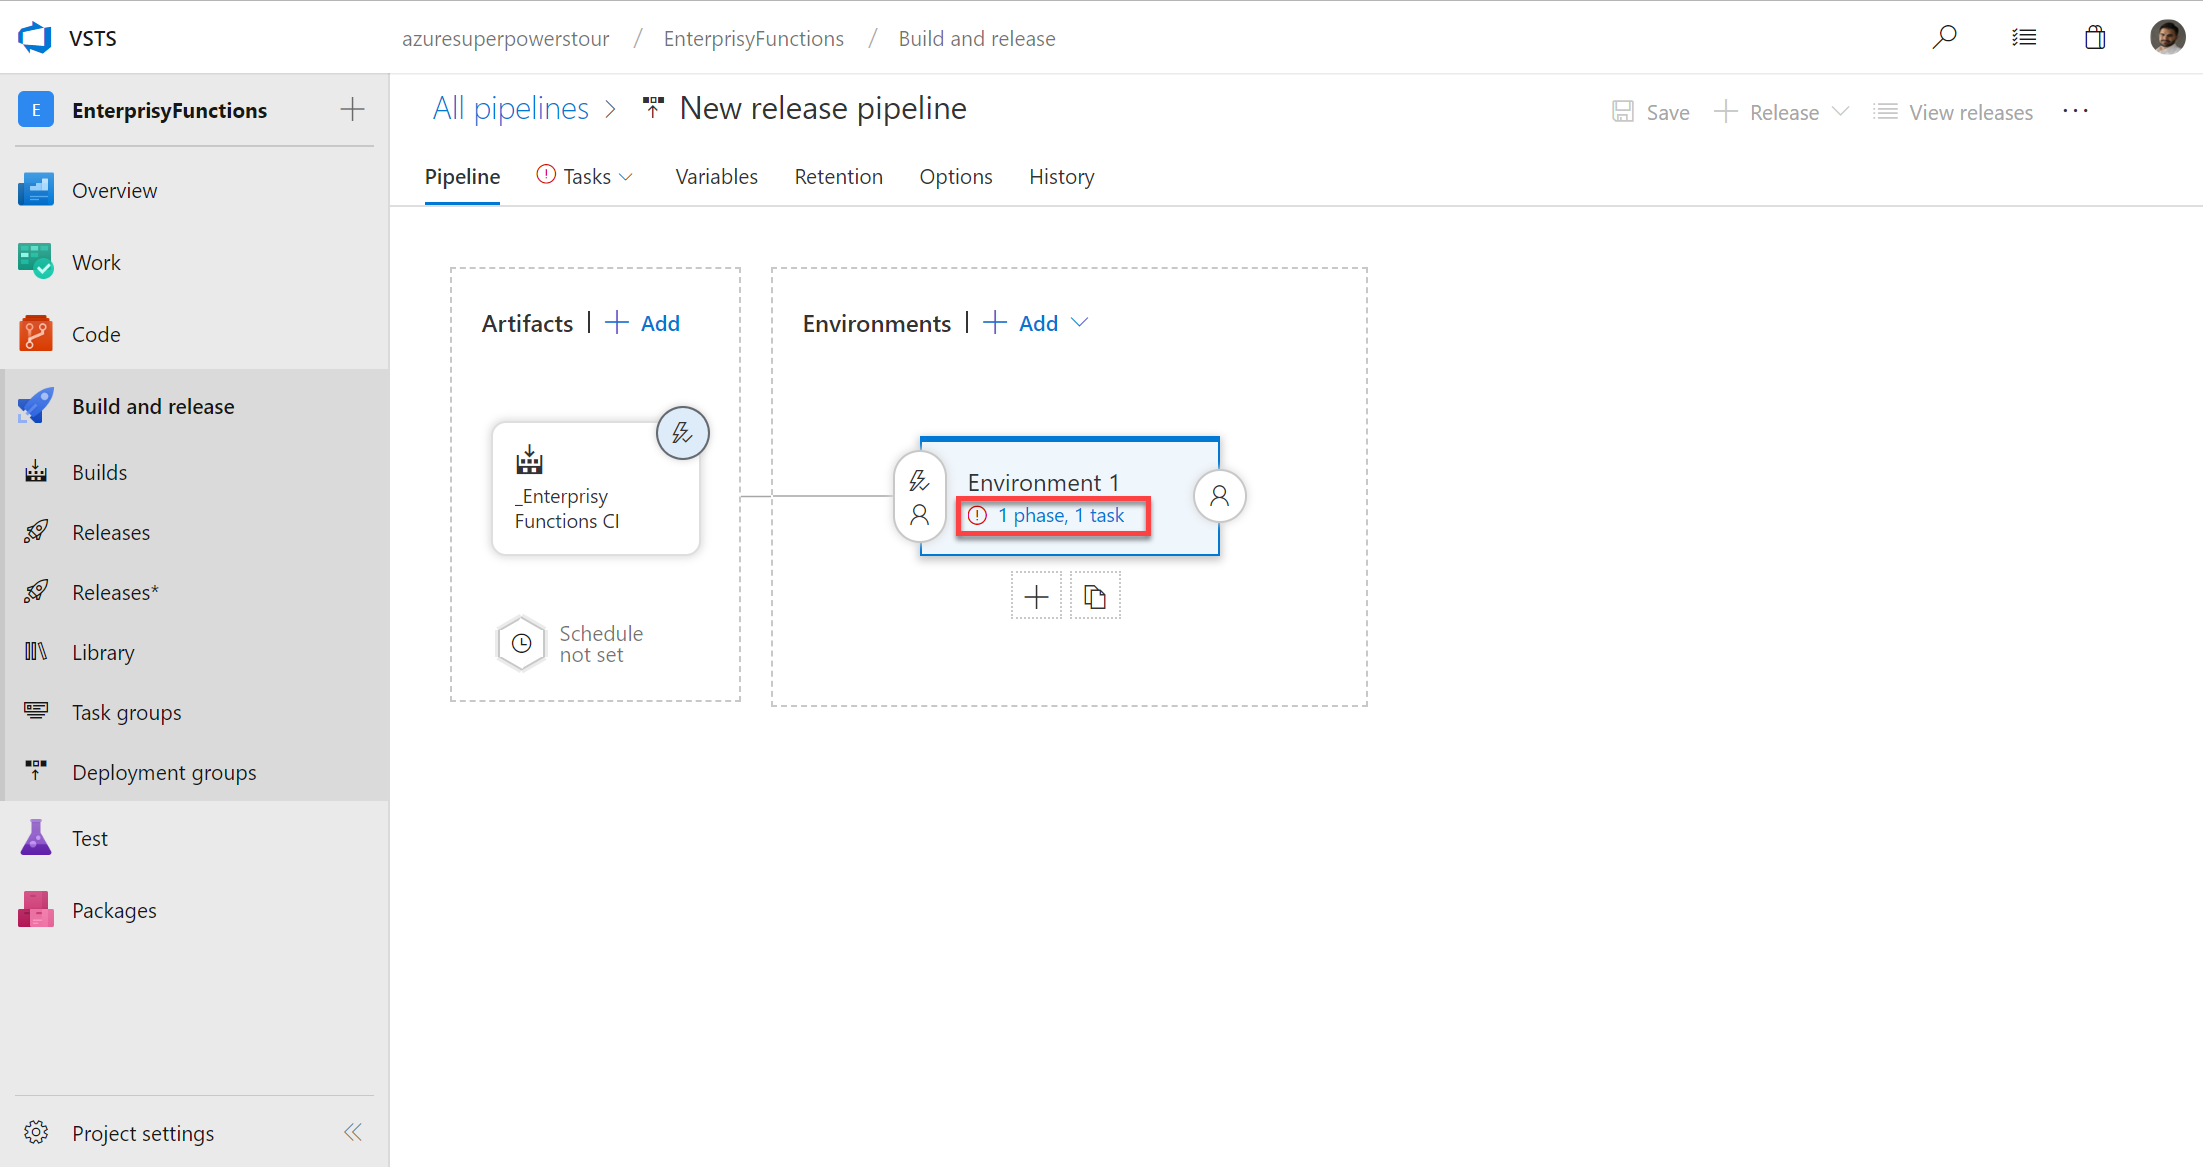
In this example, I'm just going over a single environment, but you can add as many environments as you want.

Now you can see the advantage of using VSTS for the CD pipeline. The integration with Azure is amazing. Your list of subscriptions shows up here automatically as long as you're using the same Microsoft account to log in.

And the last thing to do here is to select the right package to deploy, otherwise it's going to deploy all packages generated by the CI pipeline and the deployment will most likely fail.

Extras: Setting up deployment variables
Setting up variables is very easy for your deployment enviroments.

And you can use across all your deployment tasks by just using $([Variable Name]), in my case I'm using $(ConnectionString).

Hope it helps.
Cheers