Angular + .NET Core: Drinking Game With SignalR

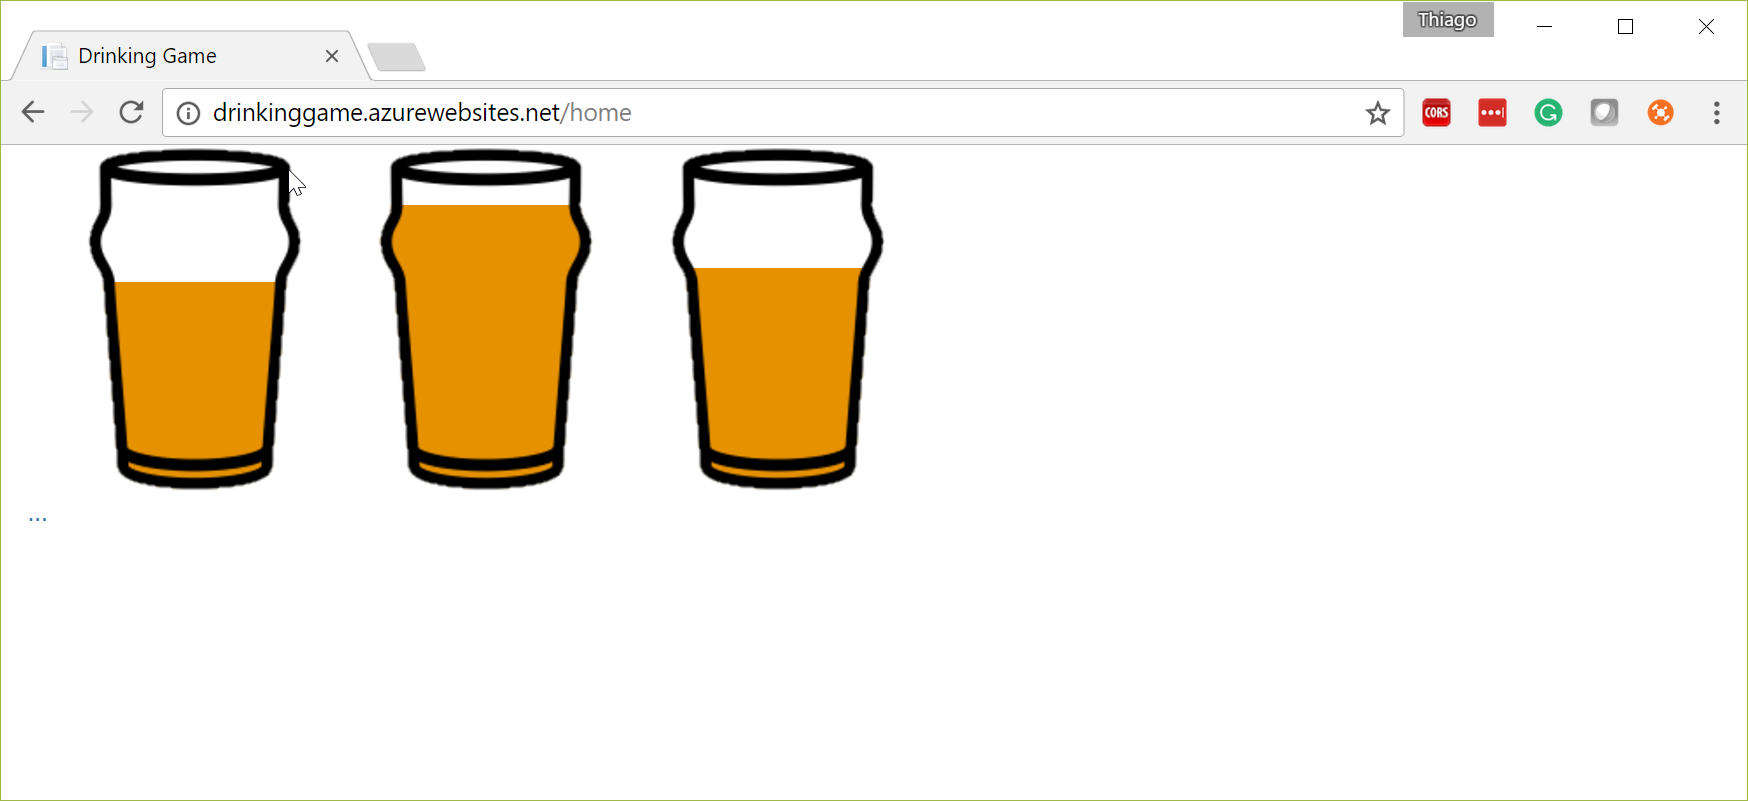
This idea came on one of the Angular Hack Days where I wanted to create something to present by the end of the day where I could get everyone involved. The game is quite simple, everyone will load the page and as people connect to the site more glasses of beer will show up on the screen, as you tap or click the amount of beer in your glass will decrease, the first person to empty their glass wins the game.
Check out the updated version of this post here
That's what you see when you have the app running with 3 people connected to it:

Of course, I could create this solution with .NET 4.6 and jQuery only, but what would be the fun of it? I wanted to use the latest and greatest as a proof of concept, so Angular and .NET Core it is.
The source code covered in this post is available here. Feel free to contribute
The application is configured to be continuously deployed to http://drinkinggame.azurewebsites.net
Some resources I've used to put this app together
- http://www.codingflow.net/...start-with-net-core-cli/
- https://chsakell.com/...ore-signalr-angular/
- https://github.com/aspnet/SignalR
So here's what I did:
- Create .NET Core app with Angular
- Add SignalR dependencies
- Configure SignalR
- Create Hub
- Reference Scripts
- Create Beer Service
- Wire the Component
Create .NET Core App with Angular
For this project, I've used the dotnet new angular template. If you haven't used the dotnet CLI before or have no idea where to get the angular template, please follow this post by Jason Taylor. It shows step-by-step how to get it done.
Add SignalR dependencies
You can either install it using npm:
npm install signalr-server --registry https://dotnet.myget.org/f/aspnetcore-ci-dev/npm/
Or you can add a package source to your local or global Nuget.config https://dotnet.myget.org/F/aspnetcore-ci-dev/api/v3/index.json then in Manage Nuget Packages look for Microsoft.AspNetCore.SignalR.Server and install it.
Configure SignalR
2 things we need to do here, both of them in the Startup.cs file.
In the ConfigureServices method, add the line below:
services.AddSignalR(options => options.Hubs.EnableDetailedErrors = true);
In the Configure method, add the line below. Just make sure it comes before app.UseMvc:
app.UseSignalR();
You can test if SignalR is configured correctly by running the application and navigating to /signalr/js. You should see a script, at this point nothing special about it as we haven't created any Hubs.
Create Hub
Just for the sake of this example, I created a Hub.cs file in the root of the project folder. And to start with I overrode two methods OnConnected and OnDisconntected.
using Microsoft.AspNetCore.SignalR;
using Microsoft.AspNetCore.SignalR.Hubs;

[HubName("BeerHub")]
public class BeerHub : Hub
{
    public override Task OnConnected()
    {
        return base.OnConnected();
    }

    public override Task OnDisconnected(bool stopCalled)
    {
        return base.OnDisconnected(stopCalled);
    }
}
Now I have to work further on both methods so I can store the connected clients and also how they are doing with their beers.
First I added a couple of static variables into my hub:
//This list will store all the connect clients
private static List<string> clients = new List<string>();
//This dictionary will store the glass of every client
private static Dictionary<string, int> glasses = new Dictionary<string, int>();
//This will store the winner
private static string winnerId = null;
Now I have to update the OnConnected method to add the client to the clients list and also initiate his/her glass:
public override Task OnConnected()
{
    if (!clients.Contains(Context.ConnectionId))
    {
        clients.Add(Context.ConnectionId);
        glasses.Add(Context.ConnectionId, 100);
        //Glass.Project is a simple projection to transform the way the data is presented
        Clients.Clients(clients).broadcastMessage(glasses.Select(Glass.Project));
    }
    return base.OnConnected();
}
Also, need to update the OnDisconnected method to remove the client from the lists.
public override Task OnDisconnected(bool stopCalled)
{

    if (clients.Contains(Context.ConnectionId))
    {
        clients.Remove(Context.ConnectionId);
        glasses.Remove(Context.ConnectionId);
        Clients.Clients(clients).broadcastMessage(glasses.Select(Glass.Project));
    }
    return base.OnDisconnected(stopCalled);
}
The last thing is to create a new public Drink method that will decrease the amount of beer in the glass for the current client:
public void Drink()
{
    try
    {
        //once there's a winner, the game is finished
        if (string.IsNullOrEmpty(winnerId))
        {
            if (clients.Contains(Context.ConnectionId))
            {
                glasses[Context.ConnectionId]--;
                if (glasses[Context.ConnectionId] <= 0)
                {
                    winnerId = Context.ConnectionId;
                    //this will send a message to the winner
                    Clients.Caller.sendMessage("You're the winner");
                }
                Clients.Clients(clients).broadcastMessage(glasses.Select(Glass.Project));
            }
        }
    }
    catch (Exception ex)
    {
    }
}
Reference Scripts
In the Home/Index.cshtml file, I included the references to both jQuery and SignalR
<script src="https://code.jquery.com/jquery-2.x-git.min.js" asp-append-version="true"></script>
<script src="http://ajax.aspnetcdn.com/ajax/signalr/jquery.signalr-2.2.0.min.js"></script>
<script src="~/signalr/js" asp-append-version="true"></script>
Create Beer Service
In my app folder, I created a beer.service.ts file.
@Injectable()
export class BeerService {

    messageSubject = new Subject<any>();

    //workaround to deal with jQuery
    window: any = (<any>window);

    constructor() {
        this.start();
    }

    drink() {
        this.server.drink();
    }

    start(): void {
        if (this.window.$.signalR && this.window.$.signalR.BeerHub && this.window.$.signalR.BeerHub.connection) {

            this.hubConnection = this.window.$.signalR.BeerHub.connection;
            this.hubConnection.url = `/signalr`;
            this.client = this.window.$.connection.BeerHub.client;
            this.server = this.window.$.connection.BeerHub.server;

            //this will be called every time Clients.Clients(clients).broadcastMessage is called from the Hub
            this.client.broadcastMessage = (msg) => {
                 this.messageSubject.next(msg);
            };

            //this will be called every time Clients.Caller.sendMessage is called from the Hub
            this.client.sendMessage = (msg) => {
                alert(msg);
            };

            this.hubConnection.start()
                .done(() => {
                    this.startingSubject.next();
                })
                .fail((error: any) => {
                    this.startingSubject.error(error);
                });
        }
    }
}
Wire the Component
Here are the changes I made to my home.component.ts:
@Component({
    selector: 'home',
    templateUrl: './home.component.html'
})
export class HomeComponent implements OnInit {

    private glasses: any;

    constructor(
        private beerService: BeerService,
        private ngZone: NgZone) {
    }

    ngOnInit(): void {
        this.beerService.messageSubject.subscribe(data => {
            //pretty ugly workaround. Will try to solve this differently
            //doing that because it wasn't being triggered by the change detection
            this.ngZone.run(() => {
                setTimeout(() => {
                    this.glasses = data;
                }, 10);
            });
        });

    }

    drink() {
        this.beerService.drink();
    }
}
Here are the changes I made to my home.component.html
<div class="row">
    <div class="col-md-2" *ngFor="let glass of glasses">
        <div class="beer-container" (click)="drink()">
            <img src="/images/glass.png" />
            <div class="beer" [style.height]="glass.Number+'%'"></div>
        </div>
    </div>
</div>
That's it. It does seem more complex than it is. Keep in mind that I created this in a couple of hours in a hack day. So some hacks are allowed. Again, feel free to contribute to the solution. I'm still going to work further on the project.
Next Steps
2018-02-26: All these features are now available here
- Wire up Gravatar
- Ability to create drinking group
- Join a drinking group
- Start drinking when everyone has joined the group
- Broadcast winner to group