Swagger All The Way Down - Part 2


In 90% of the cases where you have a microservice architecture, you will need to implement some sort of messaging system for them to communicate between each other and/or let them talk via http requests.
Using http requests is definitely the easiest way to get started, but it's also the easiest way to break your application, specially if you go hard core and write your own client.
Okay, in my previous post, I covered how to configure your .NET Core API to generate your Swagger specification and also how to generate a TypeScript client to be used by an Angular application. In this post, we'll generate a C# client using the same specification and create a new application that will leverage this new C# client.
The source code covered in this post is here
Generate C# Client
- Create a new .NET Core library project
dotnet new classlib
- Download NSwag Studio and run it.
- Paste the URL for the Swagger specification created in the part 1
- Check CSharp Client
- In my case the Namespace is SwaggerAllTheWay.Client
- Check Generate contracts output
- Scroll all the way down and configure the output file path and the contracts output, in my case
Api.Client.Generated.csandApi.Client.Contracts.Generated.cs - Save the NSwag configuration file in the folder of your class library
- Click on Generate outputs
Optional steps:
npm i -g nswag
Any further changes to your api, you can basically run in the directory you saved nswag.jsonnswag run
Package And Publish Client
- Ensure depedencies: Newtonsoft.Json
dotnet add package Newtonsoft.Json
- Pack your class library (this will create the package in the current folder)
dotnet pack -c Release /p:PackageVersion=1.0.0 -o .
- Publish your new package
- If you do not have a nuget server to push to, check this post
nuget push -Source [SOURCE] -ApiKey [KEY] [PACKAGE]
New Application Using Client
- For this example I'll use a console application
dotnet new console
- Add package published in the previous step and restore
dotnet add package SwaggerAllTheWay.Clientdotnet restore
- Open in VS Code
code .
- Bring to life
using System;
namespace SwaggerAllTheWay.Console
{
class Program
{
static void Main(string[] args)
{
//Using the client, considering it's running on port 5000
var client = new Client.SampleDataClient { BaseUrl = "http://localhost:5000" };
var forecasts = client.WeatherForecastsAsync().GetAwaiter().GetResult();
foreach (var forecast in forecasts)
{
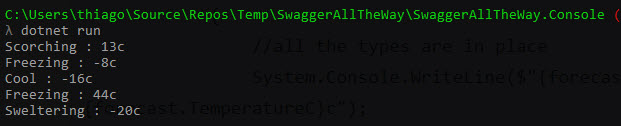
//all the types are in place
System.Console.WriteLine($"{forecast.Summary} : {forecast.TemperatureC}c");
}
}
}
}
- Now we can run the console
dotnet run
Hope it helps.
Cheers